Spotlight, a system-wide macOS feature, allows you to find apps, documents, bookmarks, contacts, emails, items from third-party apps and more, from one central place on your Mac. In order to work properly, Spotlight relies on an indexed database of all the disks and files on your system that you haven’t explicitly excluded from searching.
When Spotlight is acting up, searching your Mac may not return results you’d expect. If that’s your case, then rebuilding the Spotlight index might help fix your problems.
How to rebuild Spotlight index on Mac
Here’s how to spur a reindexation of your Mac’s startup disk.
1) Click the System Preferences icon in the Dock.
2) Click the Spotlight icon in the System Preferences window.
3) Click the Privacy tab in Spotlight preferences.

4) Drag the folder or disk that you want to reindex and drop it on the list of locations that Spotlight is prevented from searching. Since our aim is to initiate the reindexing process on the startup volume, drag the system disk icon from the desktop and drop it on the Privacy tab in the System Preferences window.
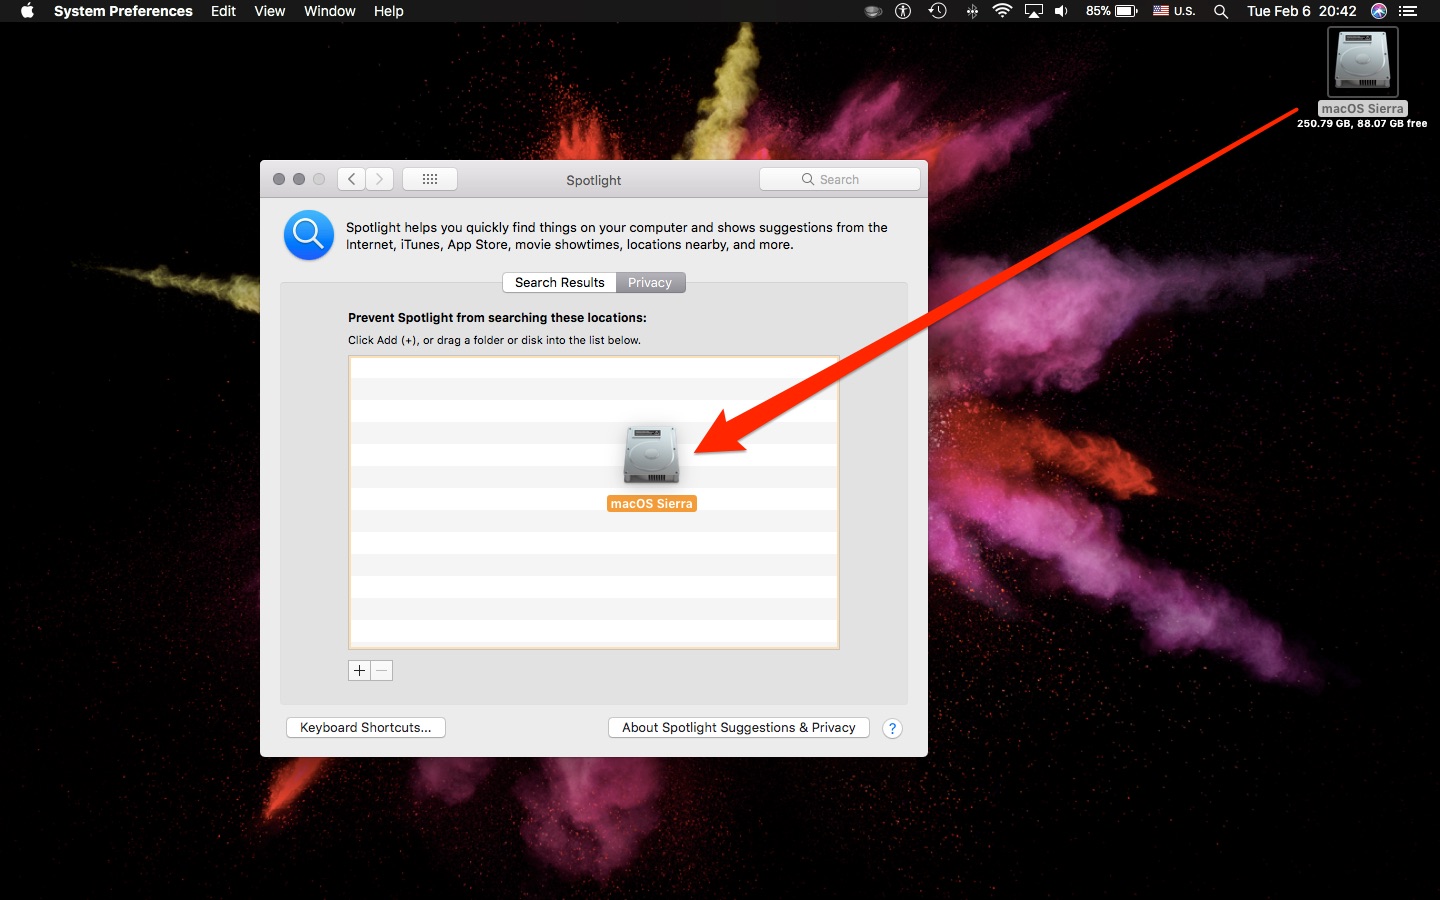
5) Click OK to confirm the operation.

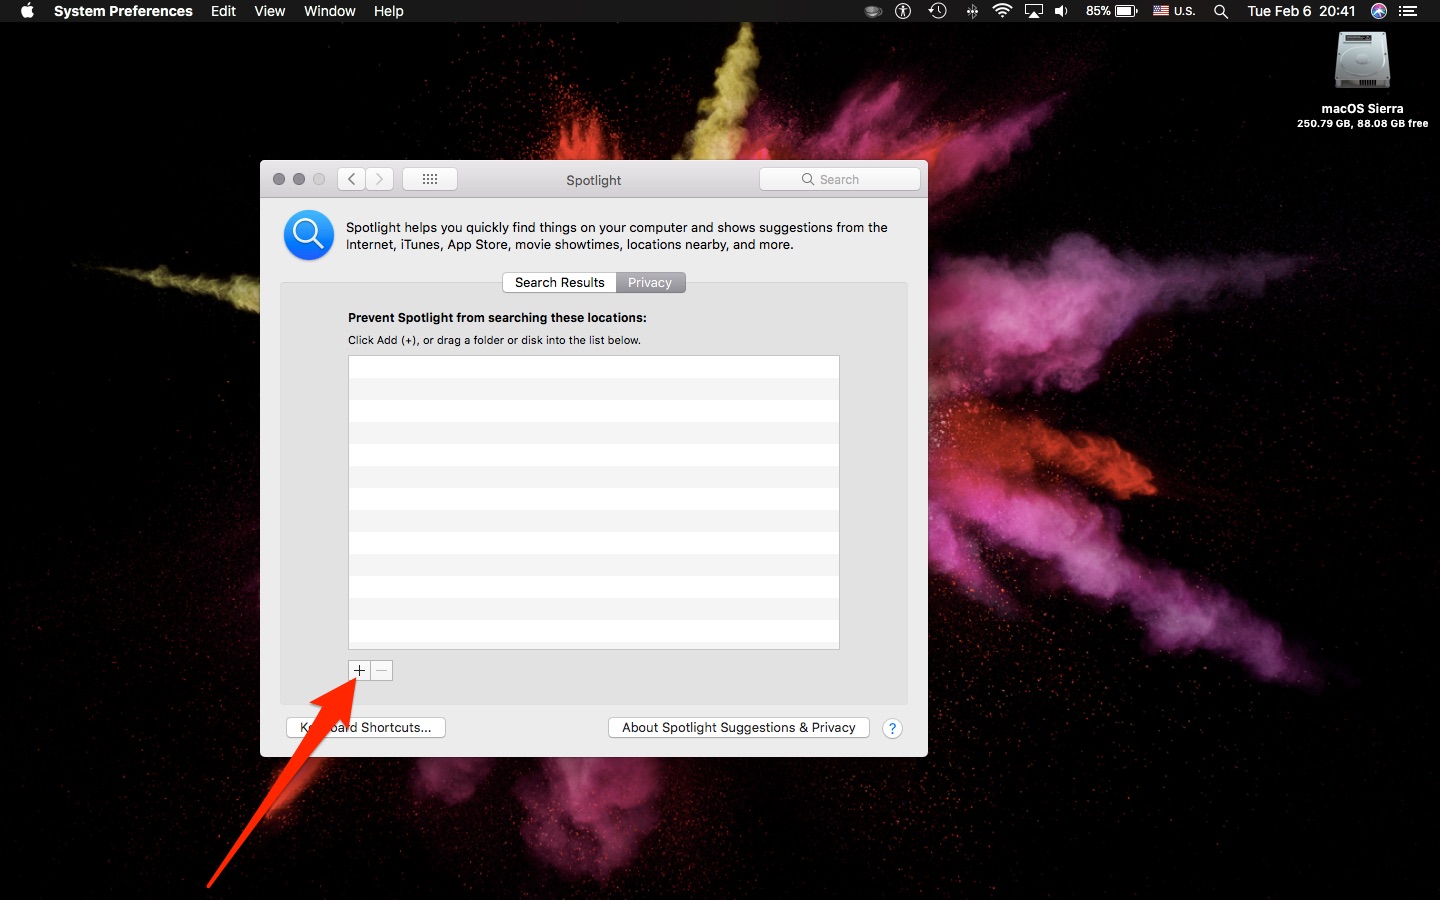
TIP: You can also click the “+” button near the lower-left corner to select items to add.
To add a folder or disk to the Privacy tab, you must have ownership permissions for that item.
6) Now remove the disk that you just added by highlighting it in the Privacy tab, then click the “–” button near the lower-left corner to remove the selected item from Spotlight’s exclusion list.

7) Close out the System Preferences window.
Adding and removing the startup disk from Spotlight’s Privacy tab, then exiting System Preferences, will prompt Spotlight to rescan and reindex the contents of the entire disk. Depending on disk size and the files stored on it, this may take anywhere from a few minutes to several hours. Your Mac may feel a little sluggish during the reindexing process.

Indexing progress is shown in Spotlight’s overlay
To see if Spotlight has finished indexing, bring up the Spotlight overlay. If you see a progress bar and a message “Indexing…”, wait a little more until the indexing process has finished.
How to rebuild Spotlight index in Terminal
In order to manually cause a reindexation of your drive or folder, open the Terminal app from the Applications/Utilities folder, then paste the following command into the Terminal window:
sudo mdutil -i on /
Press Return to execute the command, which will prompt the underlying Spotlight process to begin reindexing the startup volume. Keep in mind that you must provide an administrator password to run this command.
Apple says that excluding the startup disk from Spotlight will prevent the system from notifying you about pending updates to any Mac App Store apps that are installed on the computer.
Other Spotlight tips
The default Spotlight shortcut is Command (⌘)-Space.
To set a custom Spotlight shortcut, click Keyboard Shortcuts at the bottom of the Search Results pane or the Privacy pane in Spotlight preferences. As mentioned, you can prevent Spotlight from searching specific locations on your Mac by adding them to the Privacy tab.

Exclude folders you don’t want searched by Spotlight, like your Downloads folder
For example, I always add my user account’s Downloads folder to Spotlight’s exclusion list. Spotlight always excludes from searches any items you store on your backup disk that are not part of a Time Machine backup.
Spotlight also makes it easy to get definitions, calculations and unit conversions, find movie showtimes, weather and nearby places, search by file type or location and more.
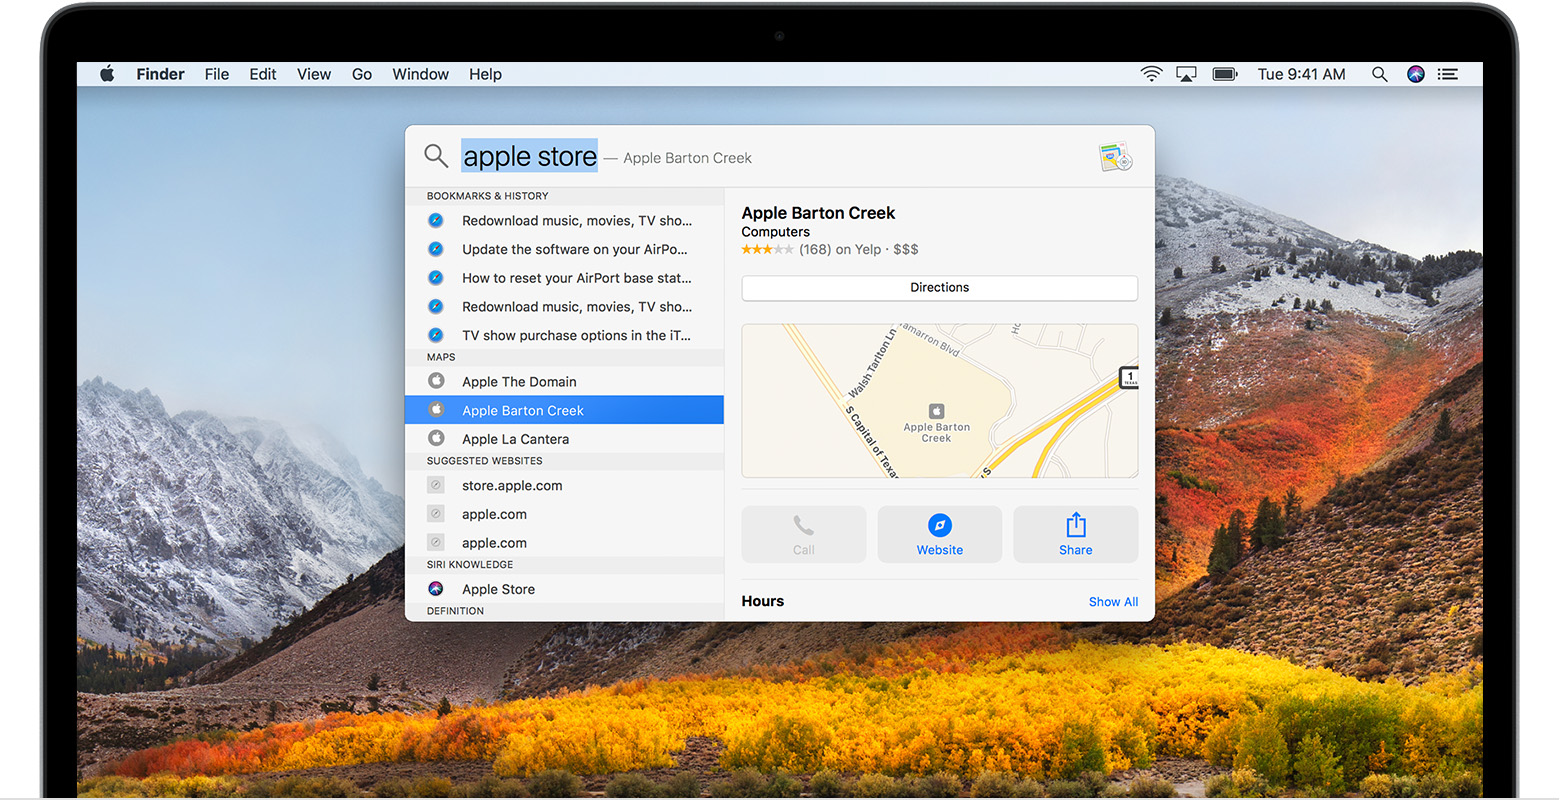
Spotlight lets you find files and apps, do quick math, cover currencies and much more
For those wondering, Spotlight for Mac was announced at the June 2004 Worldwide Developers Conference and released with Mac OS X 10.4 Tiger in April 2005. A similar feature for iOS 3.0 with the same name was announced on March 17, 2009.
iOS 11 has renamed the Spotlight feature as “Search”.