Your iPhone defaults to capturing video in high-definition (HD) 1080p resolution at 30 frames per second (FPS). With iPhone 6s or later, you can shoot crisp 4K video at four times the pixels.
And with latest devices, you can do so at twice the frame rate.
Devices with the A11 chip or newer—like iPhone 8 and iPhone X—are capable of 4K video recording at a film-style 24FPS or a silky-smooth 60 FPS, plus slow-motion filming in 1080p at 240 FPS, or twice the frame rate of older models.
Supported iPhone shooting modes
The following high-definition filming modes are supported on iPhones:
- 1080p HD at 30 FPS (default)—iPhone 4s, iPhone 5, iPhone 5c, iPhone 5s, iPhone 6, iPhone 6 Plus, iPhone 6s, iPhone 6s Plus, iPhone 7, iPhone 7 Plus, iPhone 8, iPhone 8 Plus and iPhone X.
- 1080p HD at 60 FPS (smoother)—iPhone 6, iPhone 6 Plus, iPhone 6s, iPhone 6s Plus, iPhone 7, iPhone 7 Plus, iPhone 8, iPhone 8 Plus and iPhone X
- 1080p HD at 120 FPS (slow motion)—iPhone 6s, iPhone 6s Plus, iPhone 7, iPhone 7 Plus, iPhone 8, iPhone 8 Plus and iPhone X
- 1080p HD at 240 FPS (ultra slow motion)— iPhone 8, iPhone 8 Plus and iPhone X
- 4K at 24 FPS (higher resolution, film style)— iPhone 8, iPhone 8 Plus and iPhone X
- 4K at 30 FPS (higher resolution)— iPhone 6s, iPhone 6s Plus, iPhone 7, iPhone 7 Plus, iPhone 8, iPhone 8 Plus and iPhone X
- 4K at 60 FPS (higher resolution, smoother)— iPhone 8, iPhone 8 Plus and iPhone X
At 3,840-by-2,160 pixels, 4K has four times the pixels of 1080p (1,920-by-1,080 pixels) footage.
Higher-frame rate modes—like 1080p at 240 FPS and 4K at 24/60 FPS—require the high-efficiency HEVC codec (also known as H.265) which is supported by iOS devices with Apple’s A11 chip or newer (any iPhone or iPad from iPhone 7 and 2017 iPad Pro models onward).
Manually switching the capture format from H.265 to H.264 will prompt iOS 11 to temporarily remove higher-frame rate modes from your camera settings.
This is obviously something to remember if you prefer shooting in H.264.
File size shootout: H.264 vs H.265
According to Apple, one minute of H.265-encoded 4K video at 60FPS takes up 400 megabytes of storage on the device. By comparison, a minute of 4K video at 30 FPS (half the frame rate) compressed with the older H.264 codec will cost you about 350 megabytes of storage.
As you can see, the more modern H.265 codec is extremely efficient: it only needs an additional 50 megabytes per minute for a smoother 4K footage at twice the frame rate of its H.264 counterpart, without any loss of quality.
Here’s how to set your iPhone to shoot 4K video at a silky-smooth sixty frames per second.
How to shoot 4K video at 60 FPS on iPhone
1) Open the Settings app on your iPhone.
2) Tap Camera in the list.
3) Hit the Formats option.
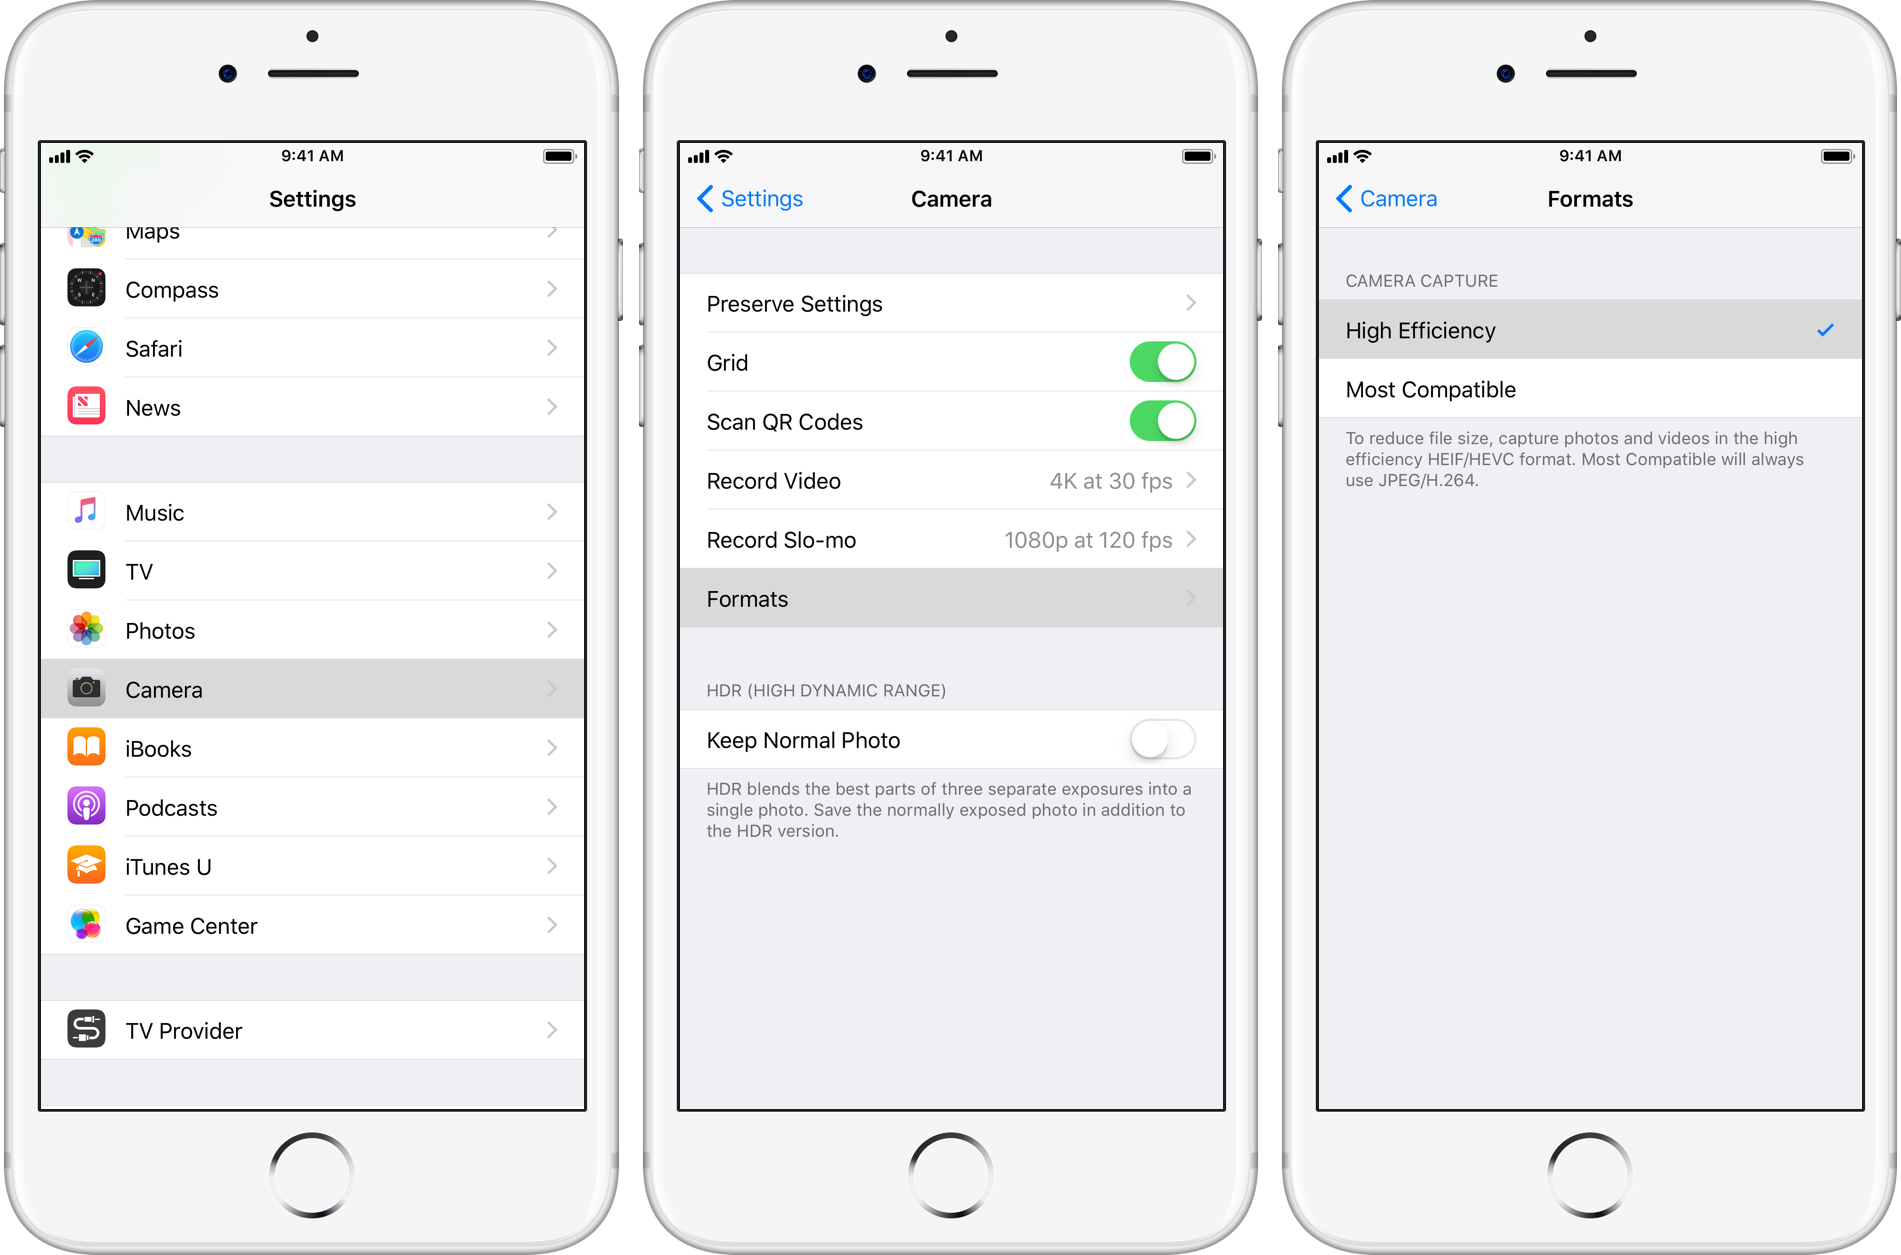
High Efficiency uses HEIF/H.265 for half smaller videos and photos without losing quality.
4) Toggle on High Efficiency to enable the H.265 codec for video and HEIF for images.
5) Swipe right from the left edge of the display to return to the previous screen, or tap the <Camera label in the upper-left corner of the interface.
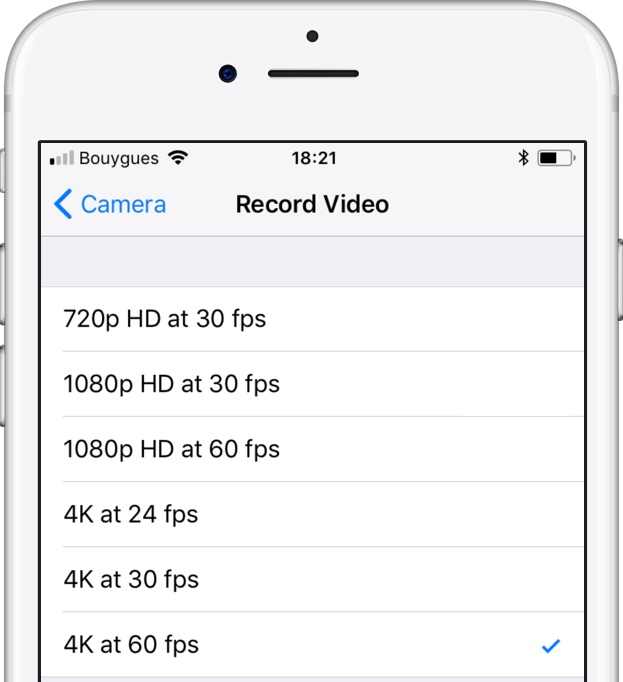
6) Now hit the Record Video option.
7) Select “4K at 60 fps” from the list.
8) Go back to the Home screen and launch the Camera app.
9) Choose Video at the bottom of the interface.
TIP: To stop the Camera app from resetting your last chosen mode (like Video, Photo or Square) every time you open it, go to Settings → Camera → Preserve Settings and toggle on the option labeled Camera Mode.
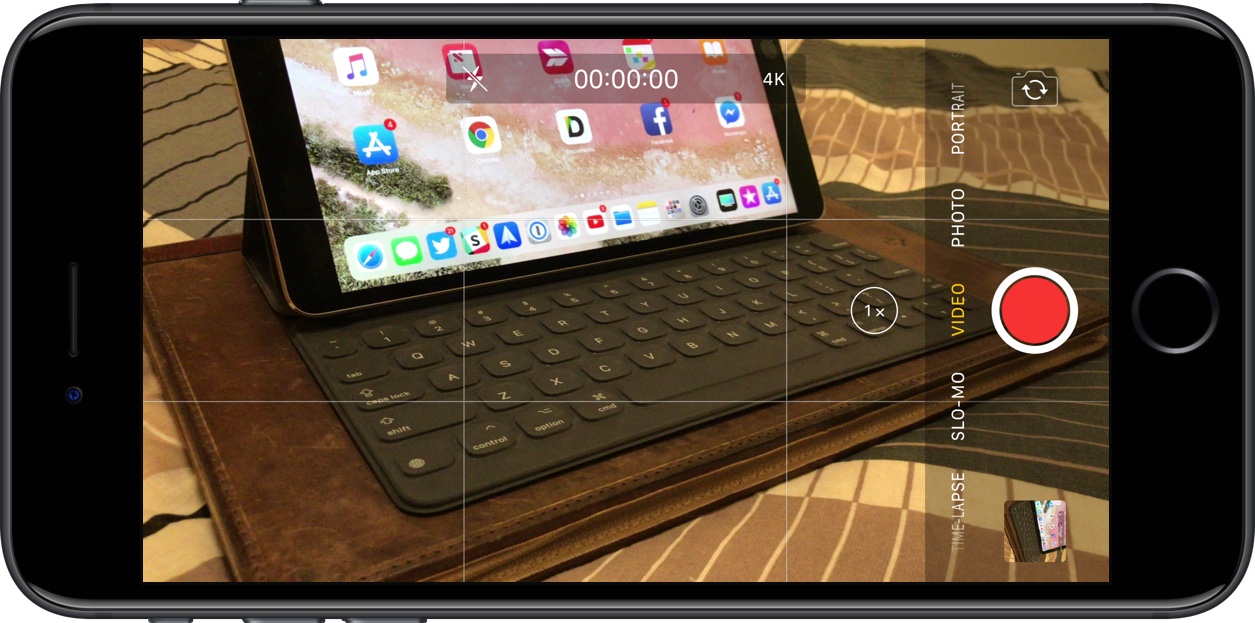
10) Tap the Record button or press either Volume button to start and stop recording.
Your video recorded in 4K resolution at sixty frames per second will be encoded using the H.265 codec and saved as a .MOV file inside the Photos app.
About watching 4K video on iPhone
There’s no need to shoot in 4K unless you plan on enjoying your high-resolution footage on a 4K/5K iMac, Apple TV 4K or a big screen 4K display. No iPhones or iPads can reproduce 4K video pixel by pixel as iOS downscales it to display resolution, resulting in loss of detail.
For instance, Plus versions of the iPhone 6, iPhone 6s, iPhone 7 and iPhone 8 models are outfitted with a 1080p screen that packs in one-quarter pixels of 4K resolution. iPhone X with its 2,436-by-1,125 pixel display isn’t a 4K presentation device either.
All iPhones since iPhone 4s have a display refresh rate of 60 Hz. That means your iPhone can reproduce the smoothness of 60 FPS video, 4K downscaling notwithstanding.
About capture formats and compatibility
As mentioned, iPhone 8 or newer defaults to the H.265 video codec.
H.265 permits your device to deliver similar video quality at around half the file size of the older H.264 codec. Your H.265 videos take up significantly less storage space on the device, sync with iCloud faster and consume less bandwidth when streamed or shared.
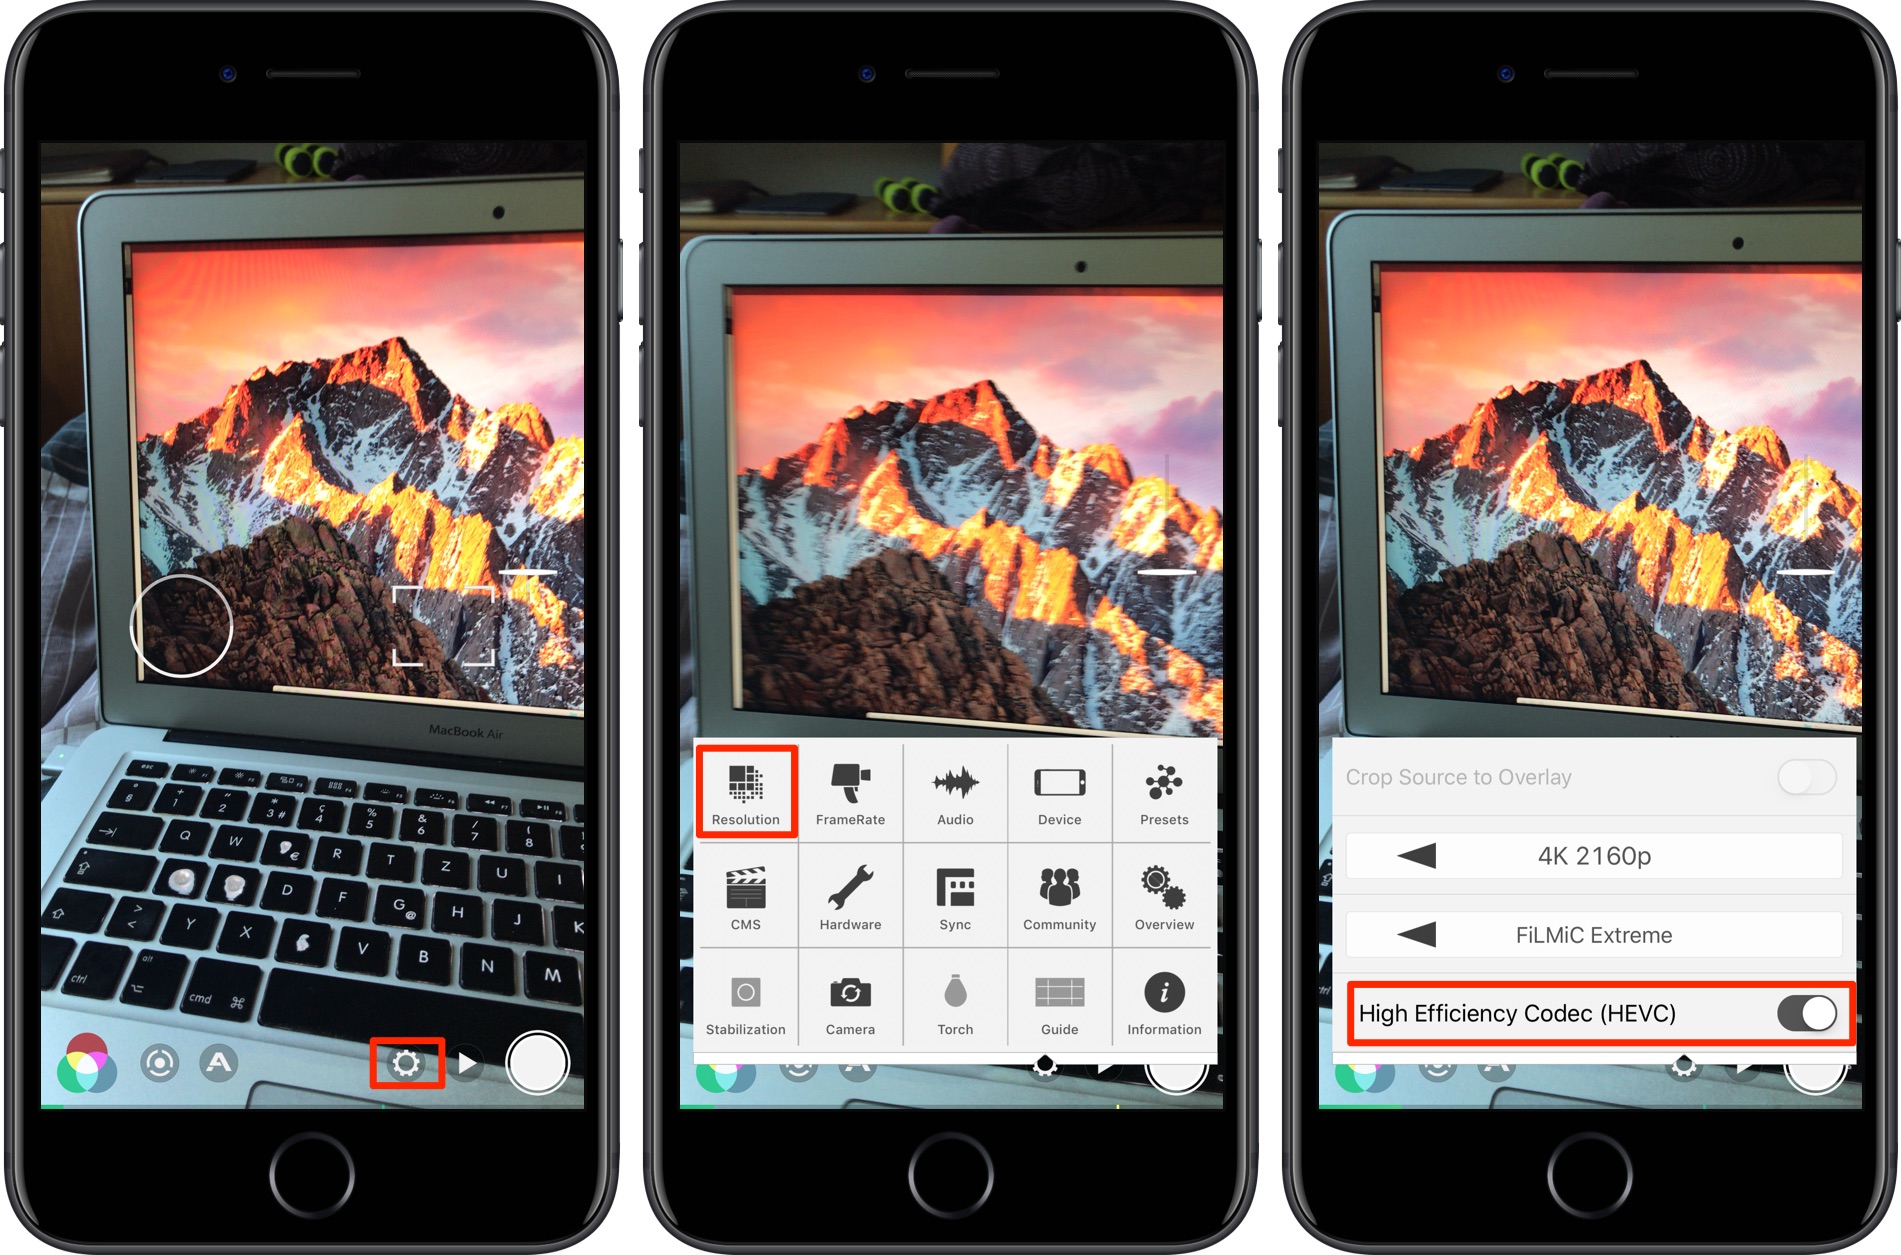
Third-party apps like FiLMiC Pro may support video recording using the H.265 codec
If, for some reason, you’d like to forgo significant storage savings afforded by the efficient H.265 codec and keep on shooting in H.264 whenever possible, remember to manually revert to the H.264 codec after recording clips in modes that require the H.265 codec.
As we mentioned earlier, your iPhone 8 or later requires H.265 for shooting 4K video in 24/60 FPS or for any Slow-mo frame rate greater than 120fps for 1080p resolution.
TUTORIAL: How to choose between JPEG/H.264 and HEIF/H.265 media formats in iOS 11
To change your shooting format back to H.264 after using camera modes that require H.265, venture into Settings → Camera → Formats, then choose the Most Compatible option.
This tells iOS to save new photos/videos in the more compatible JPG/H.264 format (your existing HEIF/H.265 media in Photos won’t be automatically converted to JPEG/H.264).
NOTE: You won’t see the Formats menu on unsupported devices. Capturing in the new HEIF/H.265 format is possible on hardware powered by an A10 Fusion chip or newer, like iPhone 7, iPhone 7 Plus, iPhone 8, iPhone 8 Plus, iPhone X and 2017 iPad Pro models.
Transferring H.265 media to a Mac or Windows PC via USB?
iOS 11 gives you two related options underneath the Transfer to Mac or PC heading in Settings → Camera: Automatic and Keep Originals.
The Automatic option transcodes any H.265 videos into the H.264 format and HEIF images into JPEGs. The operating system does this on the fly, without touching the originals, as the items are being transferred to your computer via USB.
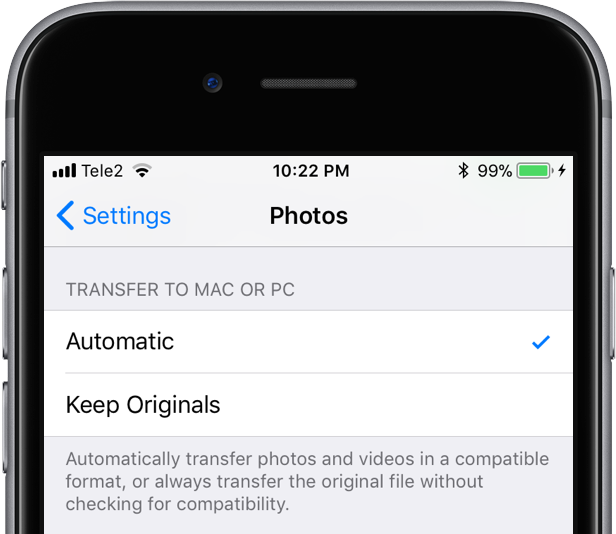
As the name suggests, Keep Originals always sends the original files via USB.
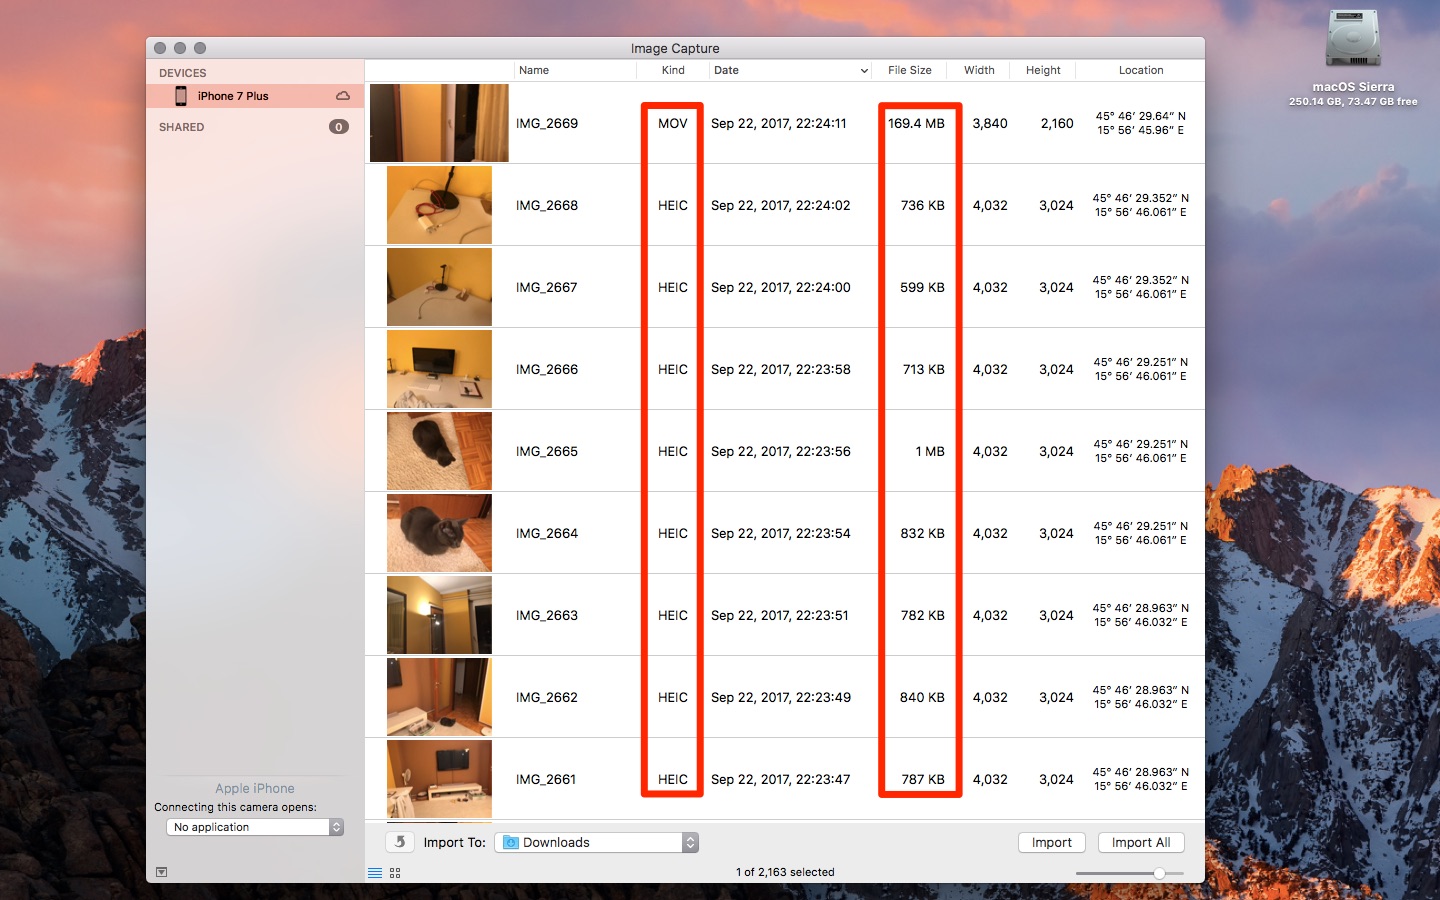
As an example, selecting Keep Originals will tell iOS to send any HEIF/H.264 media in your Photos library to your computer as the respective .HEIC files and H.264-encoded .MOV items. Likewise, JPEGs and H.264-encoded videos are sent as standard .JPG files and H.264-encoded .MOV files, respectively.
iOS also ensures you don’t run into compatibility issues with HEIF/H.265 media.
For instance, every time you share HEIF images or H.265 videos using AirDrop or one of the Share sheet services such as Mail, Messages or third-party ones, iOS always sends the items in the more compatible JPEG or H.264 format.