By default, any screenshots you take on your Mac end up on the desktop. You can also set them to be saved to any custom folder, such as Downloads.
If you’re like me, you probably move some screenshots (like those of specifics apps) to your project folders. While that helps with organization, it makes finding all the screenshots saved on your Mac harder than it needs to be.
In this tutorial, we’ll use a few little-known tricks to help you quickly locate all of the screenshots you’ve taken on your Mac, no matter how deep they might be buried.
macOS’s Spotlight tags screenshots with a specific key that gets stored in file metadata. This makes it very easy, if not trivial, to find all screenshots with Finder, Spotlight or Terminal.
How to find Mac screenshots with Finder
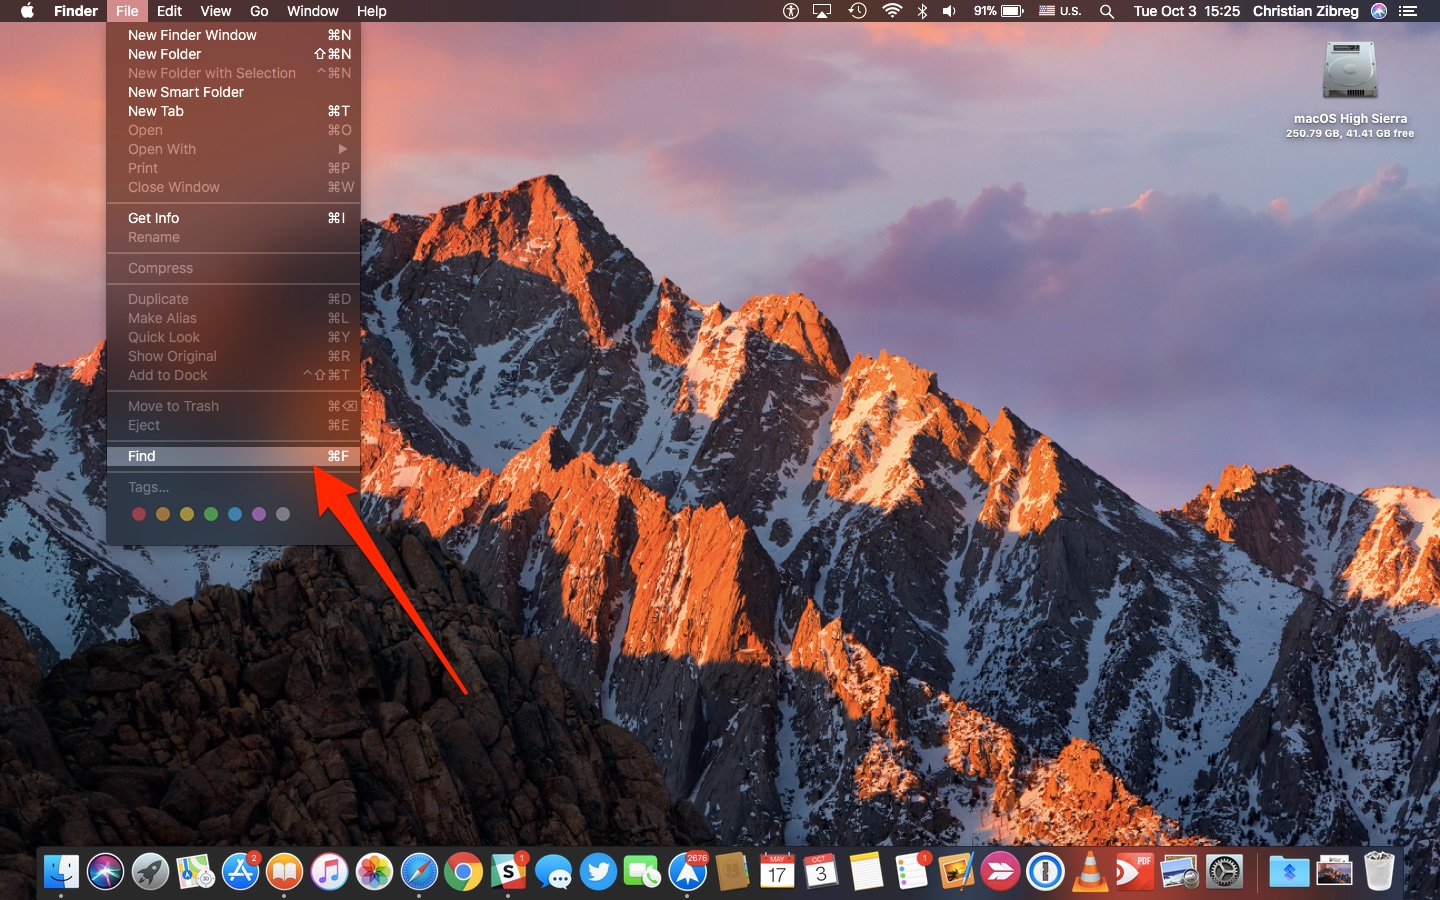
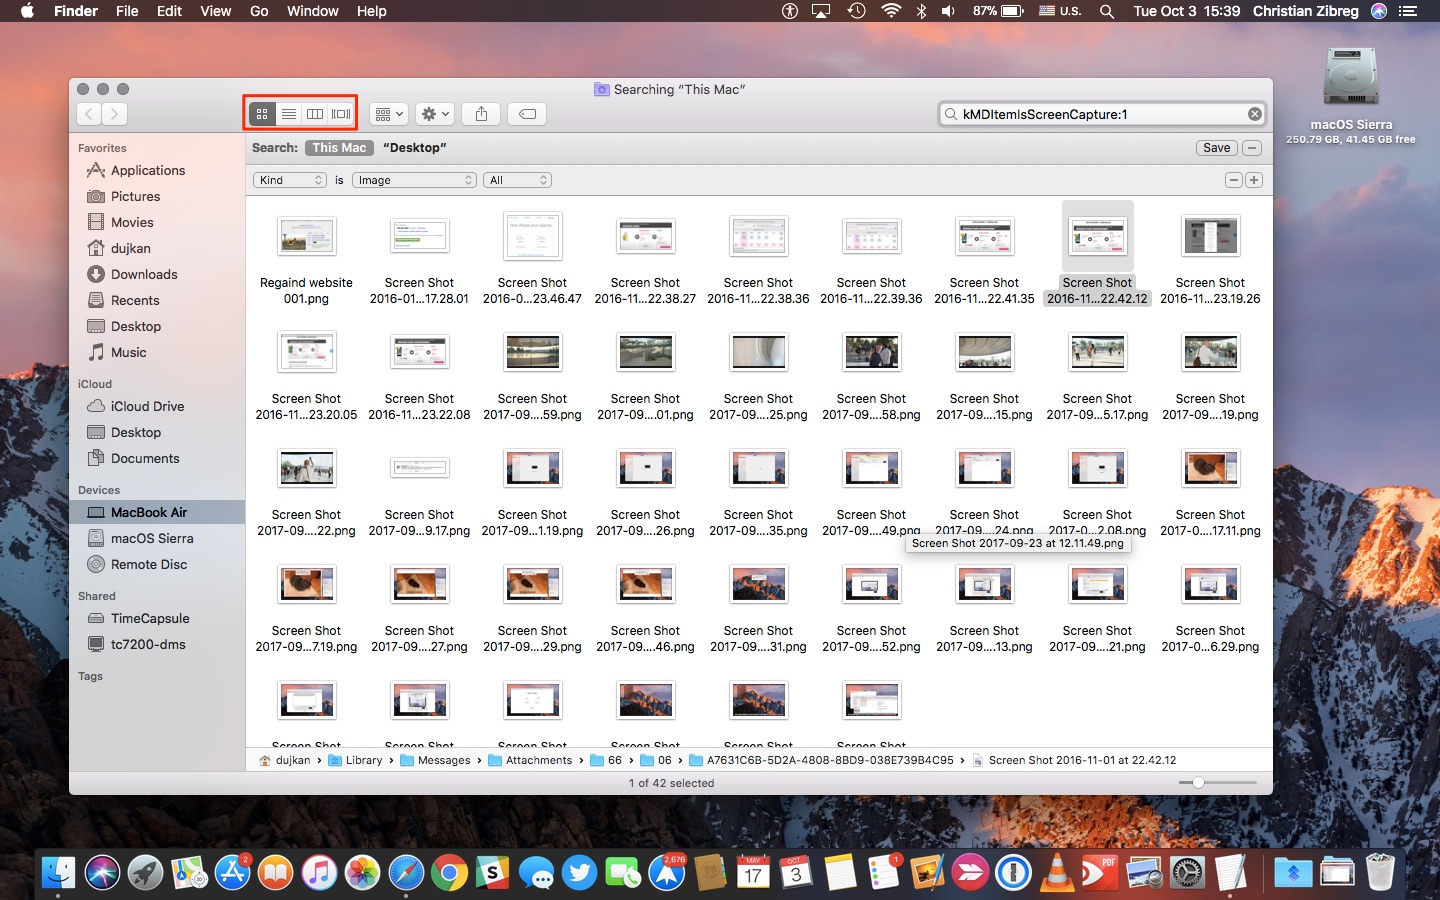
1) Click the desktop, then choose Find from the Finder menu. Alternatively, press the Command (⌘)-F combination on the keyboard.
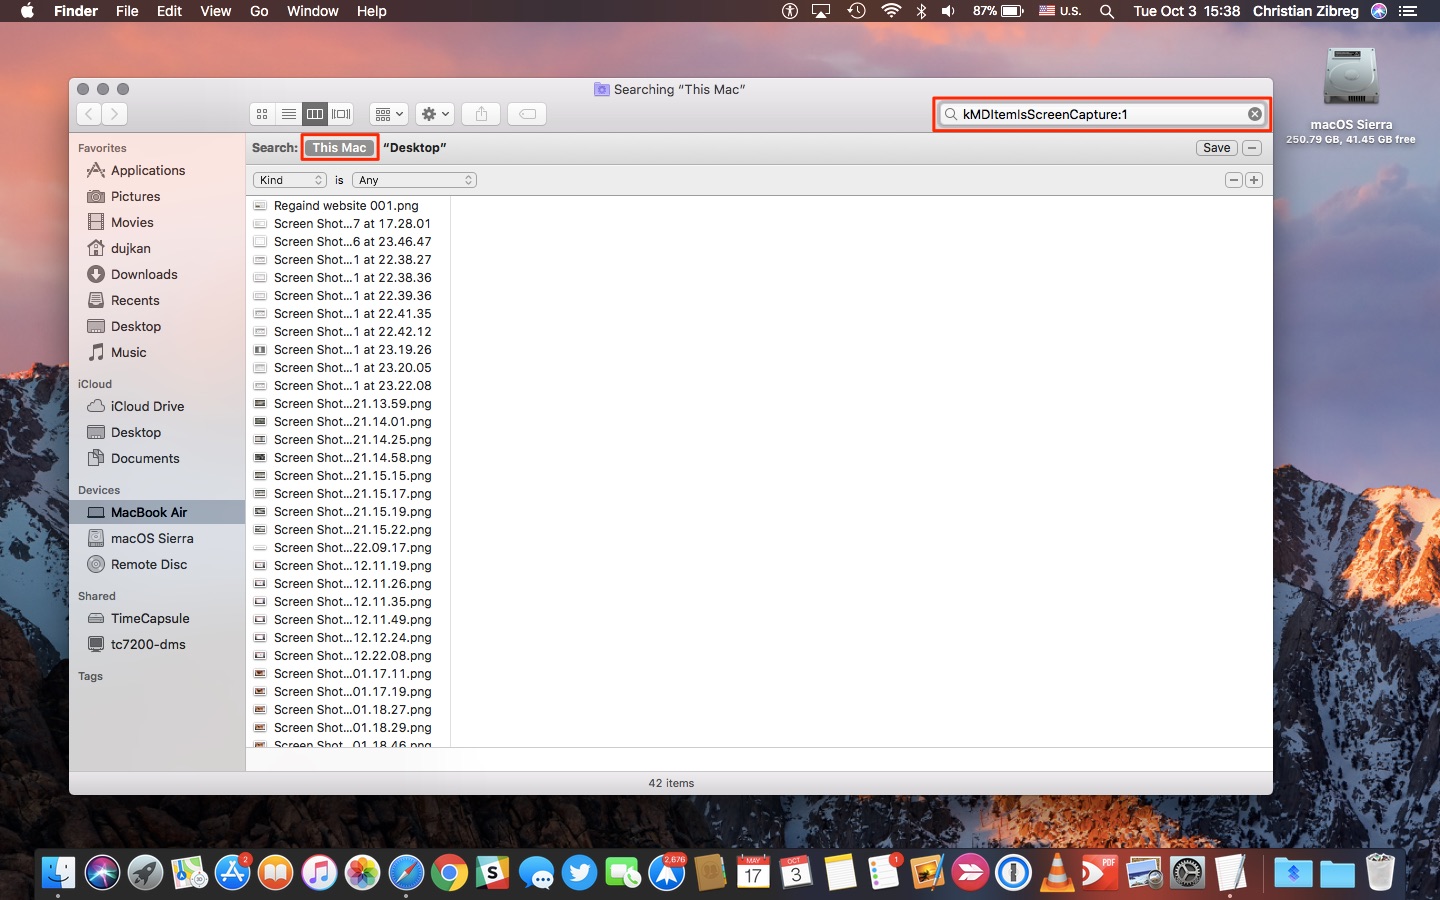
2) You’ll be presented with a Finder Search window.
- Click This Mac next to Search: underneath the window’s toolbar. This sets your search scope to the entire startup drive.
- Type “kMDItemIsScreenCapture:1” into the window’s search filed. With macOS 10.8 and higher, all screenshot images are saved with the “kMDItemIsScreenCapture” flag so you can search for them easily.
The Finder Search window gets instantly populated with any matching screenshots saved on your Mac’s startup drive, including any screenshots in your iCloud Drive cached on this Mac.
To delete them all from your Mac at once, regardless of where they happen to be stored, just choose Select All from the Finder’s Edit menu and drag the files to the Trash.
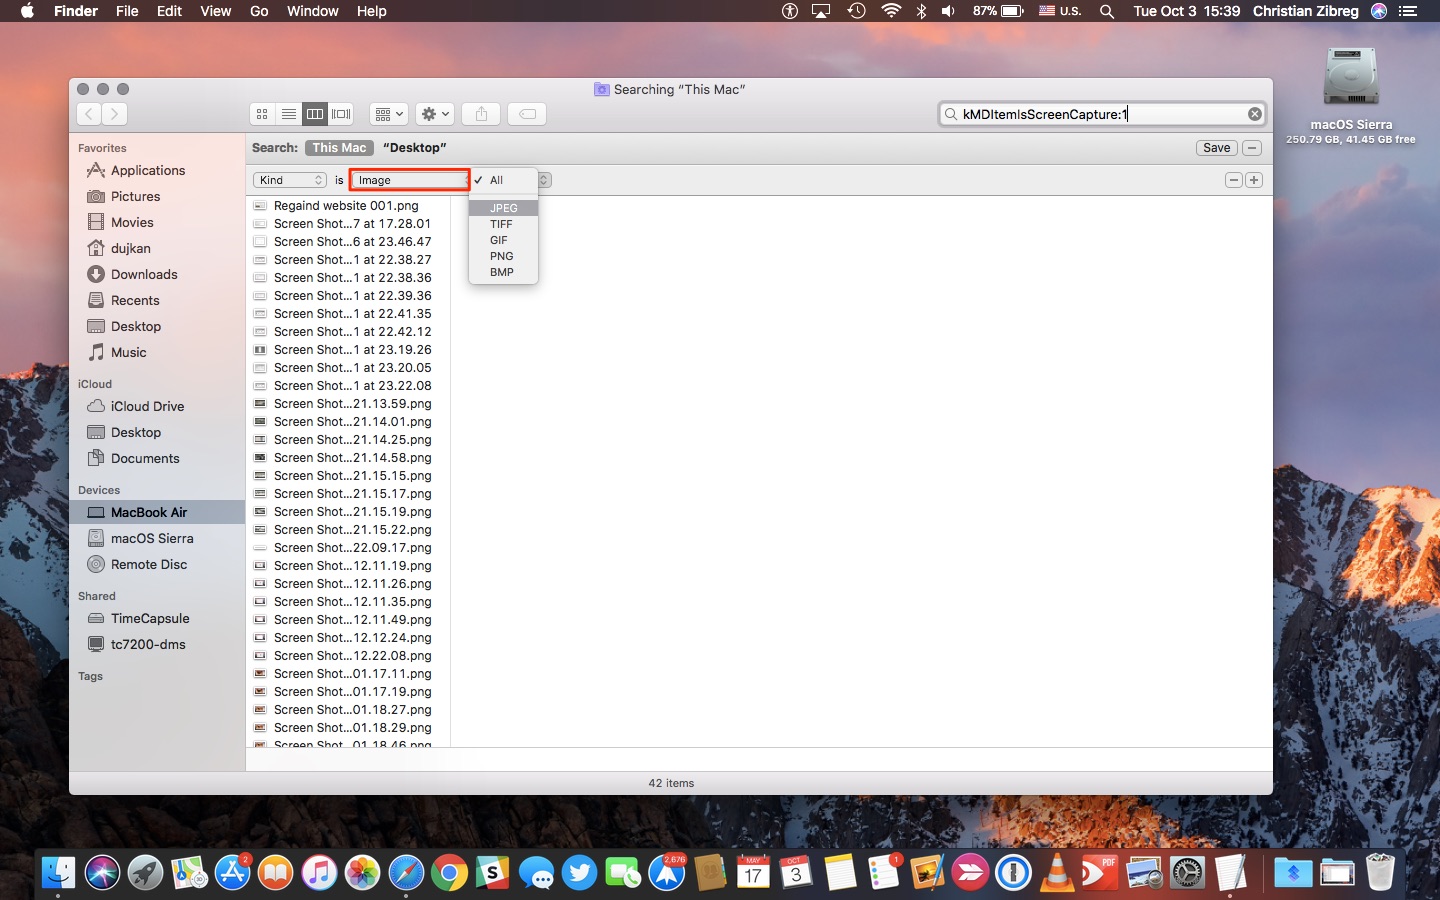
To narrow down your search to specific file types, click the Image menu and choose between JPEG, TIFF, GIF, PNG or BMP. By default, macOS saves screenshots as PNGs.
To browse your screenshots visually, switch to the Icons view in the toolbar. You can also press Command (⌘) —1, Command (⌘)—2, Command (⌘)—3 or Command (⌘)—4 to quickly switch between the Icons, List, Columns and Cover Flow views.
Lastly, you can save this search for quick access from the Finder’s side menu by hitting Save in the window’s top-right corner. Now name your custom search (i.e. “Screenshots”), make sure that the box Add to Sidebar is ticked, then hit the Save button.
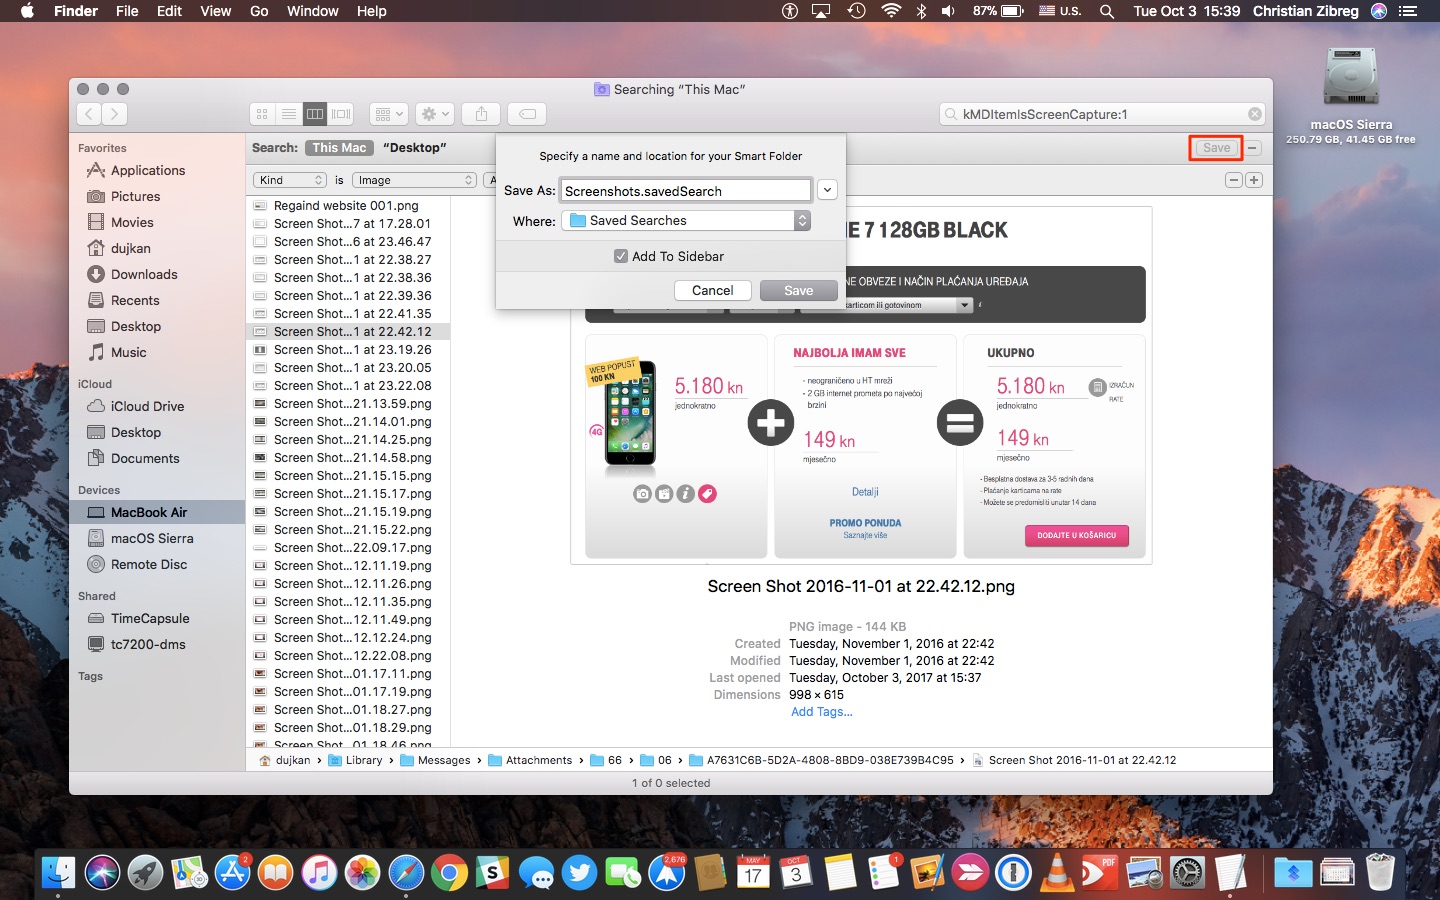
This will create a new Smart Folder based on your search criteria.
As a quick refresher, Smart Folders in macOS behave just like Smart Playlists in iTunes or the Screenshots album in iOS Photos. A Smart Folder isn’t really a folder, it’s a saved search that collates any matching files based on custom criteria
Just like Smart Playlists in iTunes, the Finder’s Smart Folders are continually updated in the background as you work with your files so you always get the most up-to-date results.
How to find Mac screenshots with Spotlight
1) Bring up the Spotlight function by clicking the Spotlight icon in your Mac’s menu bar. Alternatively, hit the default Command (⌘) – Spacebar to invoke Spotlight anywhere in macOS.
2) Type this into the search field:
kMDItemIsScreenCapture:1
Just like that, all the screenshots you’ve taken pop up in Spotlight!
Use the arrow keys on the keyboard to highlight an item in your search results.
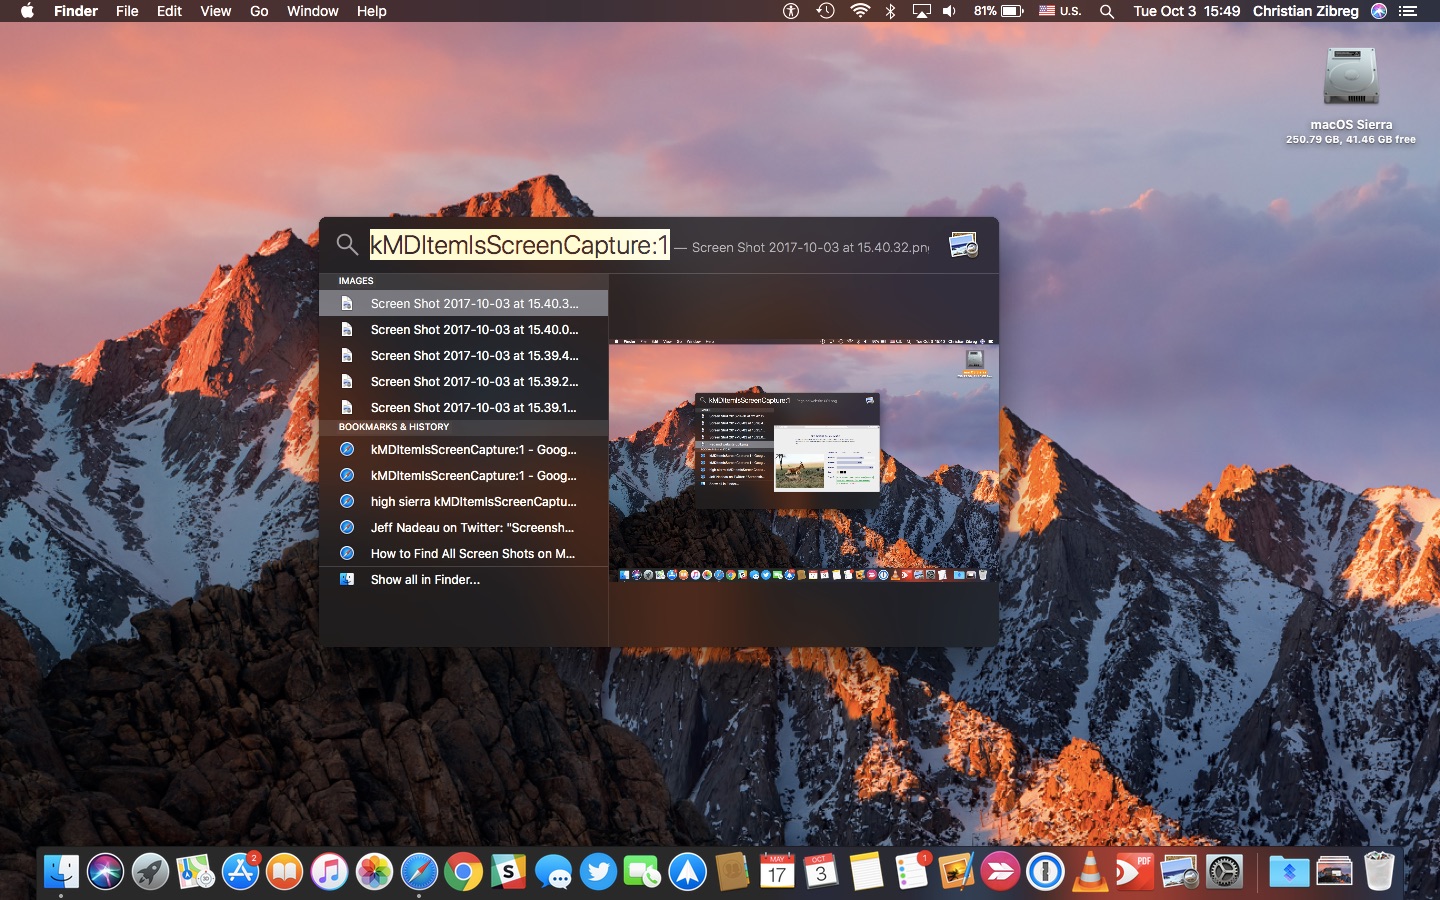
You even get a nice preview image right there in the Spotlight overlay.
To zoom in on the image, hold the Option (⌥) key than par around with the trackpad/mouse. To reveal the file’s full path at the bottom of the Spotlight overlay, hold the Command (⌘) key. To open the highlighted file, press Enter on the keyboard.
Spotlight lists only a few items for any given file type. To see additional results, hit the Show All in Finder option at the bottom of the Spotlight overlay.
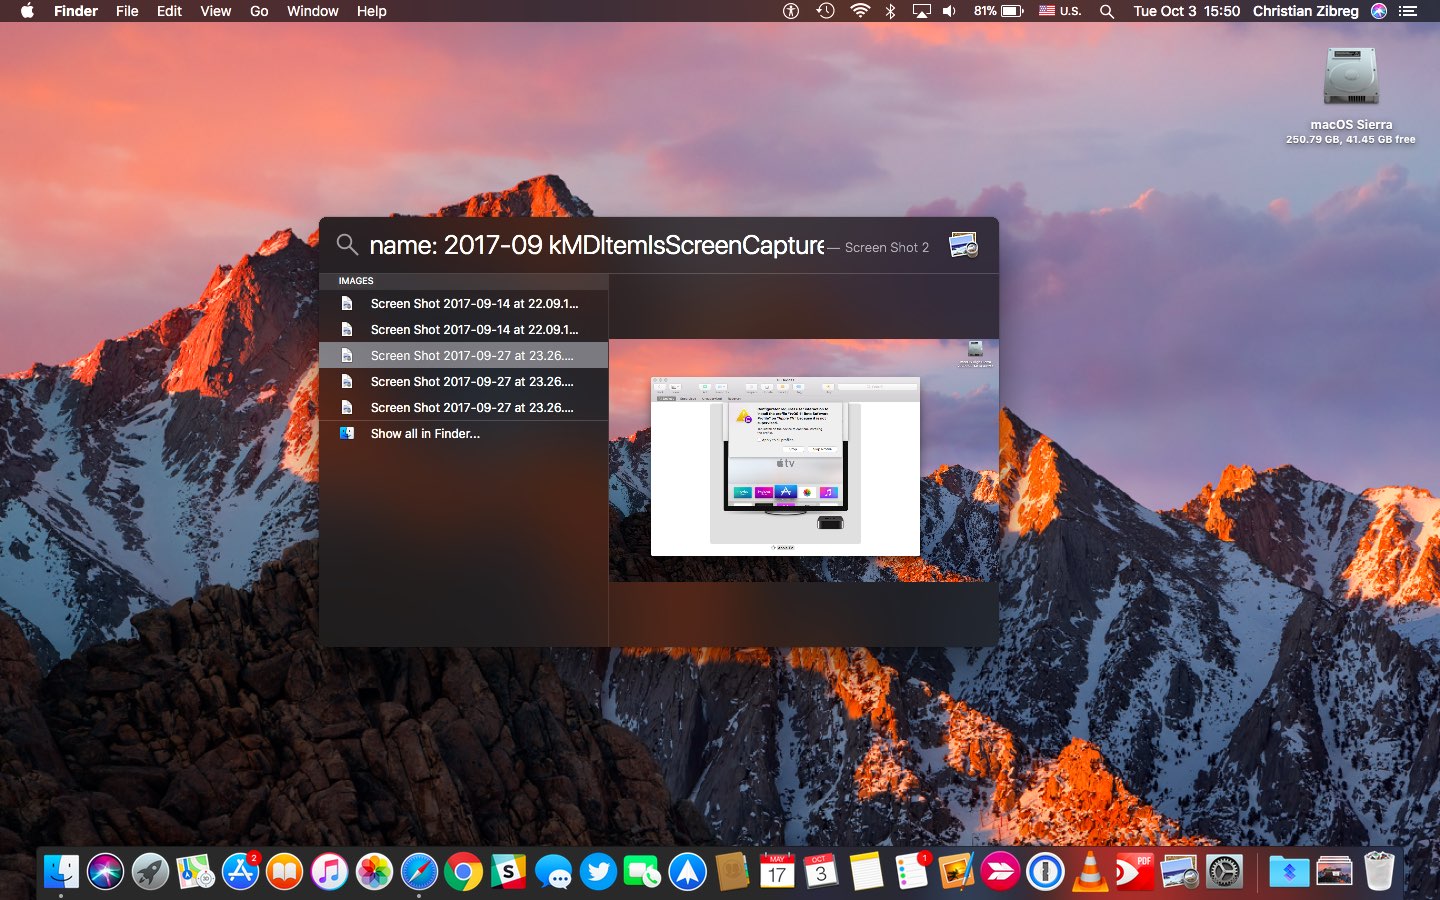
If you’d like to locate screenshots with a specific string in their file names, you can do that, too—simply precede your search term with “name: STRING”, like this:
name: 2017-09 kMDItemIsScreenCapture:1
The above command takes advantage of macOS’s default screenshot-naming scheme and custom Spotlight operators to locate the screenshots I took in September 2017.
Or, you could omit “name:” from your query altogether and go with:
2017-09 kMDItemIsScreenCapture:1
To exclude other file types and limit your results to screenshots, use the following syntax:
kind: image kMDItemIsScreenCapture:1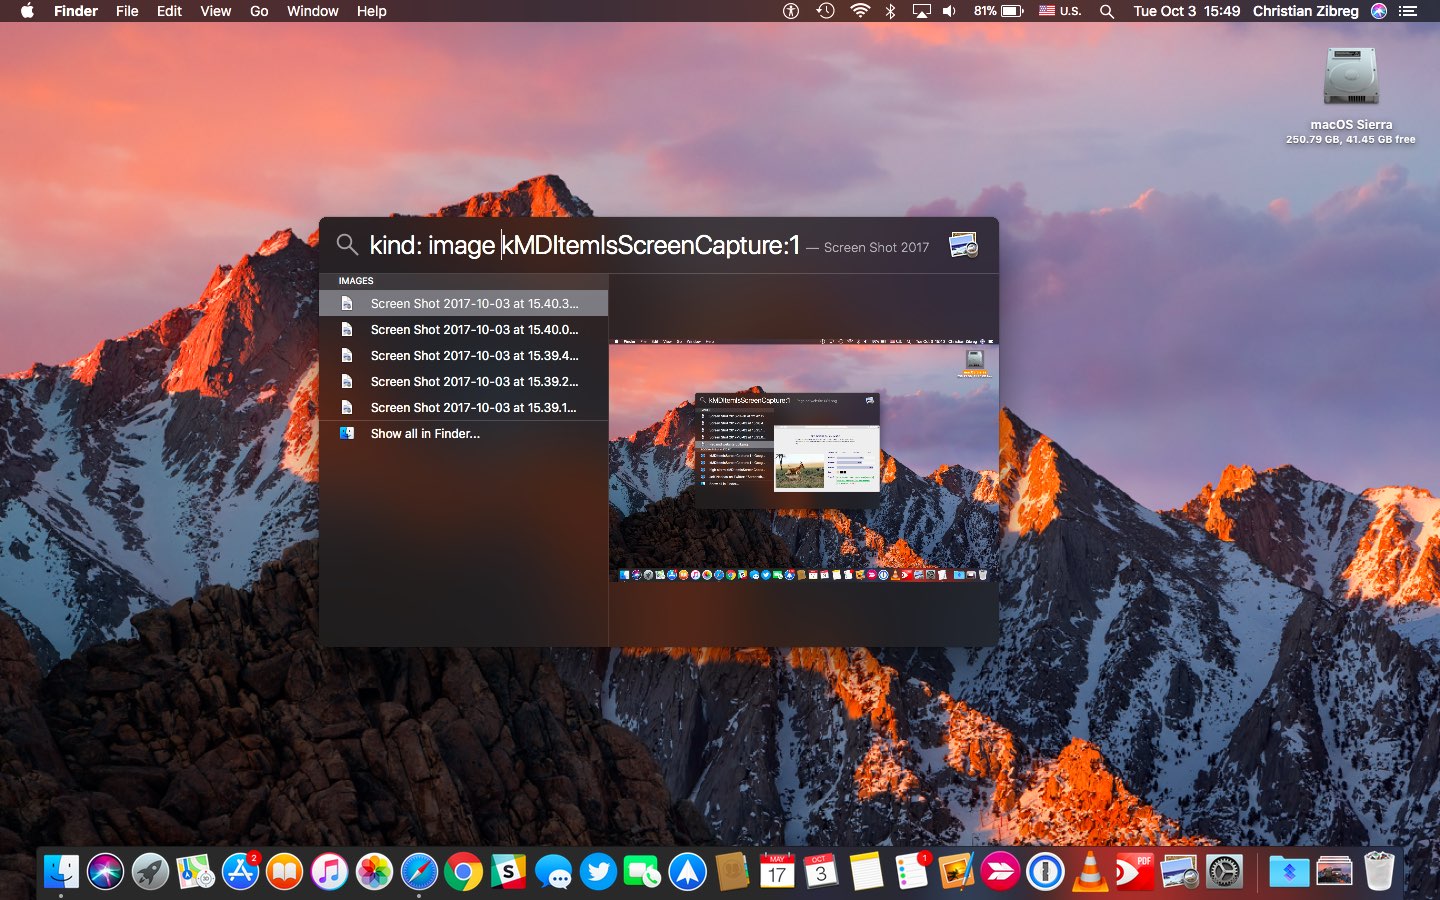
If you’ve changed the format in which screenshots are saved from the default PNG to JPG or TIFF, use an appropriate “kind:” operator. For example, to find only the screenshots that are saved as JPG files, run this command through Spotlight:
kind: JPG kMDItemIsScreenCapture:1
I save my screenshots as JPGs, but I know I have a few PNG screenshots buried somewhere.
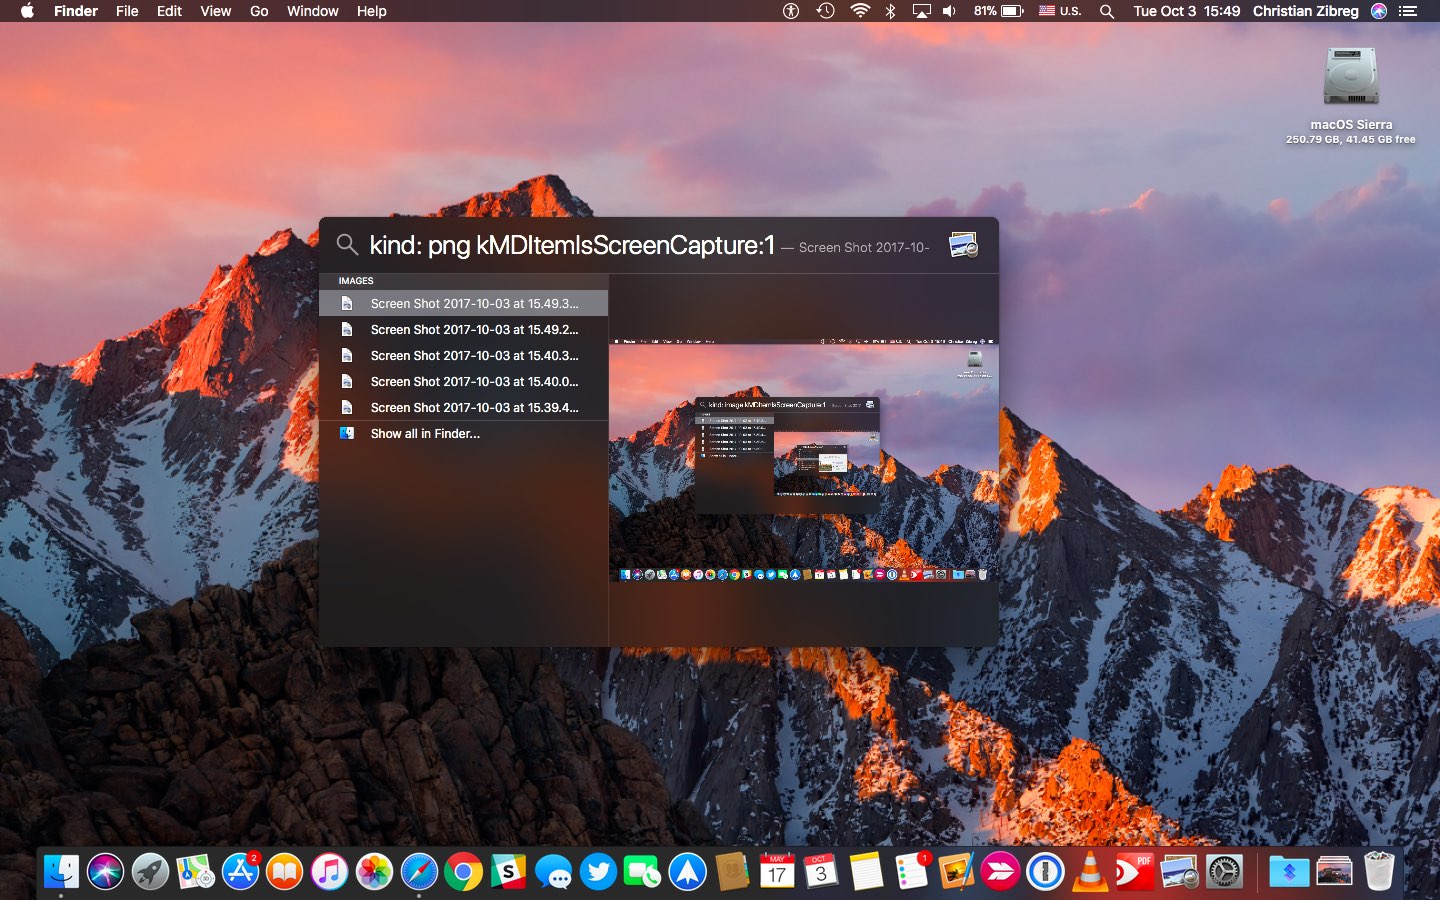
To search for those, I’d use the following syntax:
kind: PNG kMDItemIsScreenCapture:1
Feel free to take advantage of other advanced search operators to further narrow your results to the screenshots that were created before, after, between or on specific dates.
All of the above tricks also work with “mdfind” at the command line.
How to find Mac screenshots with Terminal
1) Open a new Terminal window.
2) Type the following:
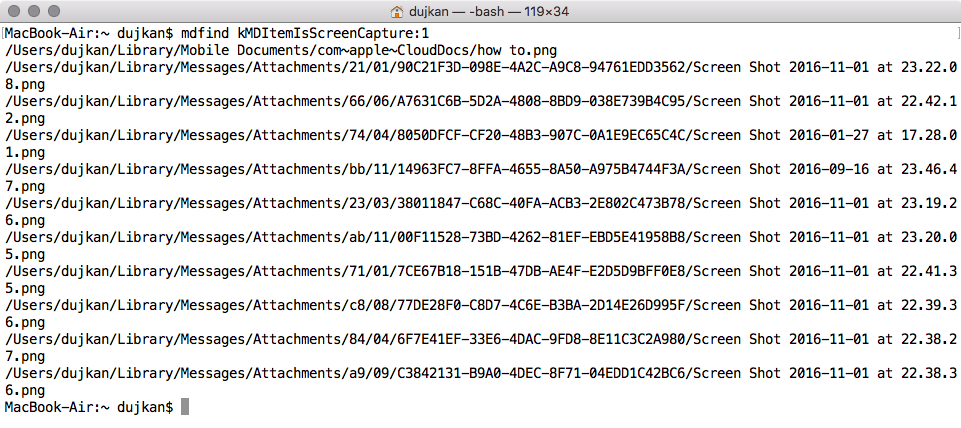
mdfind kMDItemIsScreenCapture:1
3) Press Enter on the keyboard to execute the command.
You’ll get the file names of all the screenshots saved on your Mac.
You can use “mdlist” and “mdfind” commands to search anything based on metadata.
NOTE: Because we’re using Spotlight and file metadata to locate your saved screenshots, please be advised that the aforementioned tricks will disregard any screenshot files that are saved in locations that you’ve excluded from Spotlight search.
As a quick refresher, you can prevent Spotlight from searching specific folders on your Mac by going to System Preferences → Spotlight → Privacy, then click the Plus sign to select one or more folders on your Mac that you’d like to exclude from Spotlight Search.
As an example, I’ve excluded the Downloads folder from being indexed by Spotlight.