Managing your inbox can be a daunting task these days. From those important emails you must see to those that just get in the way, it can be tedious to organize it all to see what you want to see.
If you use the Mail app on your Mac, you can set up email rules that help you manage it all. Direct emails as they arrive, mark them so they’re easier to spot, and clean up your inbox easily, here’s how.
Access the Mail app Rules
With your Mail app open, follow these steps to access the Rules area.
1) Click Mail from the menu and select Preferences.
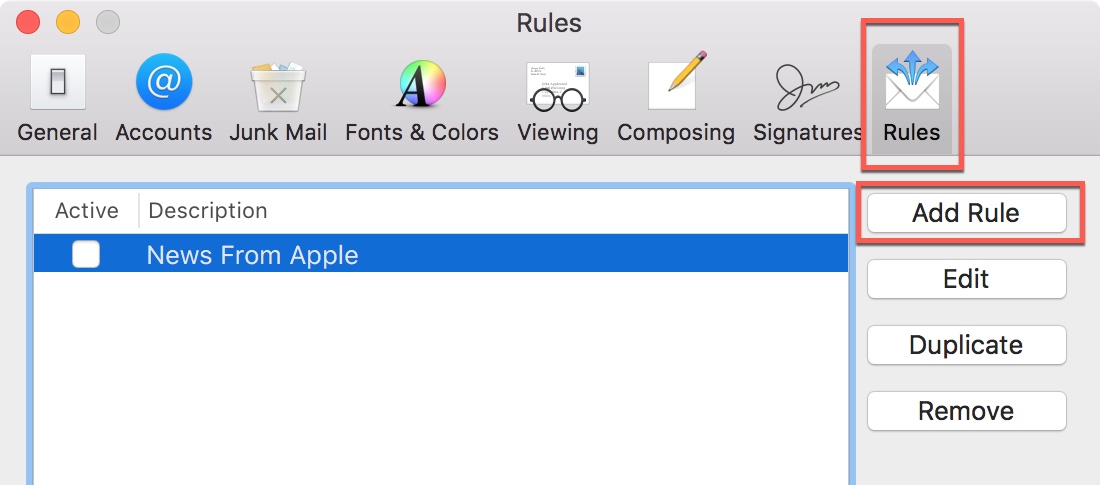
2) In the window that pops open, click Rules.
3) Any rules you have set up will be displayed. To create a new one, click Add Rule.
Create a Mail Rule
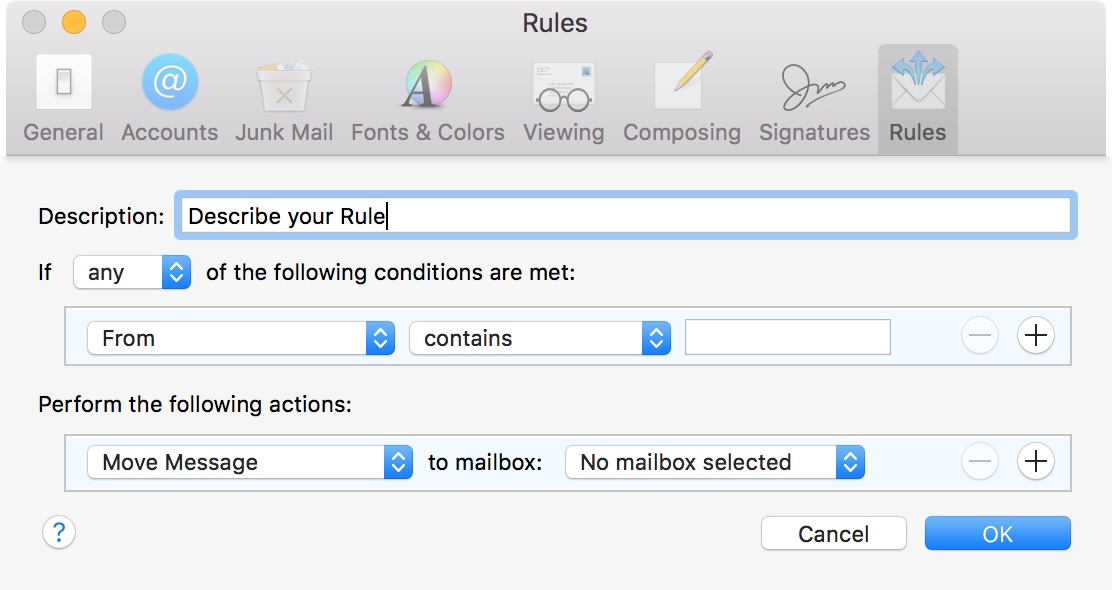
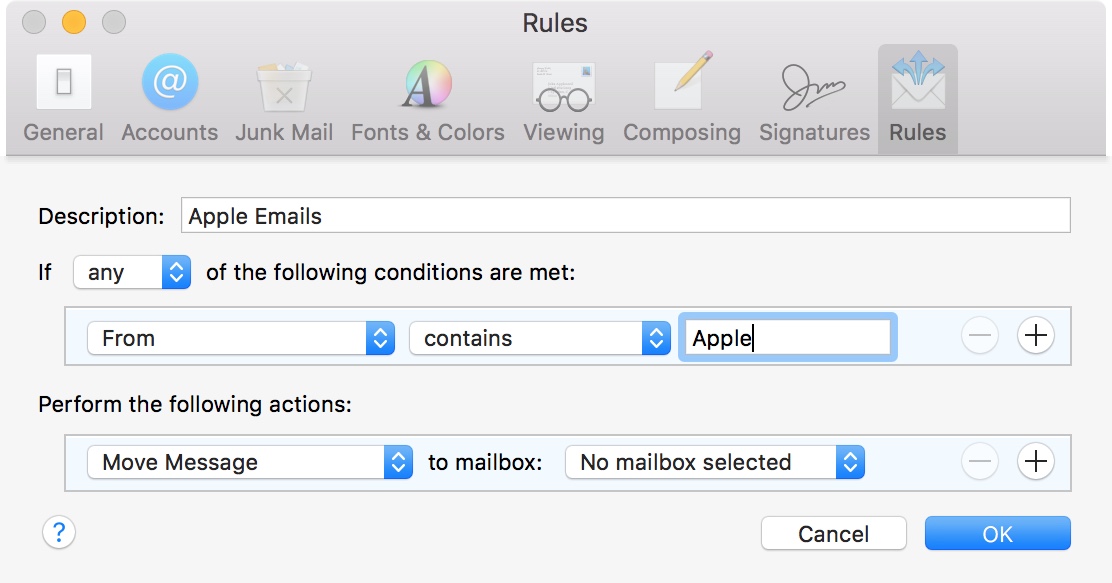
After you click Add Rule, a box will appear with various options for the type of Rule you want to create. Start by describing your Rule or simply giving it a name that makes sense to you. Then, go on to set it up.
Set up the conditions
The next section is where you set up the conditions for the incoming email. After the word If, select either Any or All from the dropdown box. Ask yourself, do you want any condition you enter to be met or all of them?
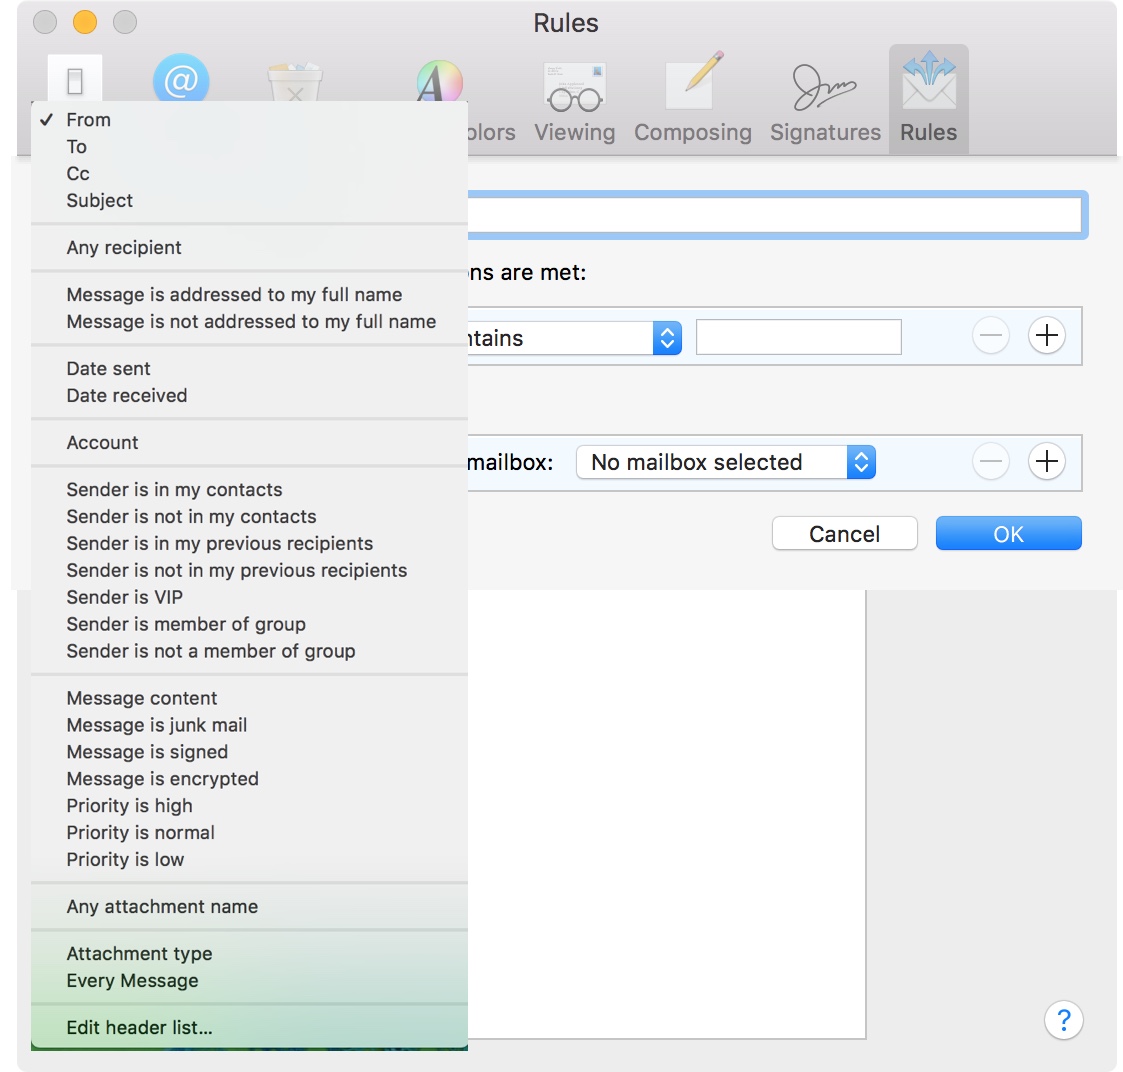
After that, you set up the conditions to meet and you have many options to choose from. The first box is for those emails coming in and how to identify them. So, select from choices like:
- Who the email comes from, who is copied, or what’s in the subject line
- The date sent or received
- If the sender is in your contacts or not, is a VIP, or is a member of a group
- If the email priority is high, normal, or low
- The email contains a certain type of attachment
Depending on the option you select, you will see different options. For example, Sender is in my contacts, Priority, or Message is junk mail do not offer any further conditions to set up. But, others ask for additional conditions. For instance, Attachment type asks you to pick from a list and date sent or received prompts you for the email age.
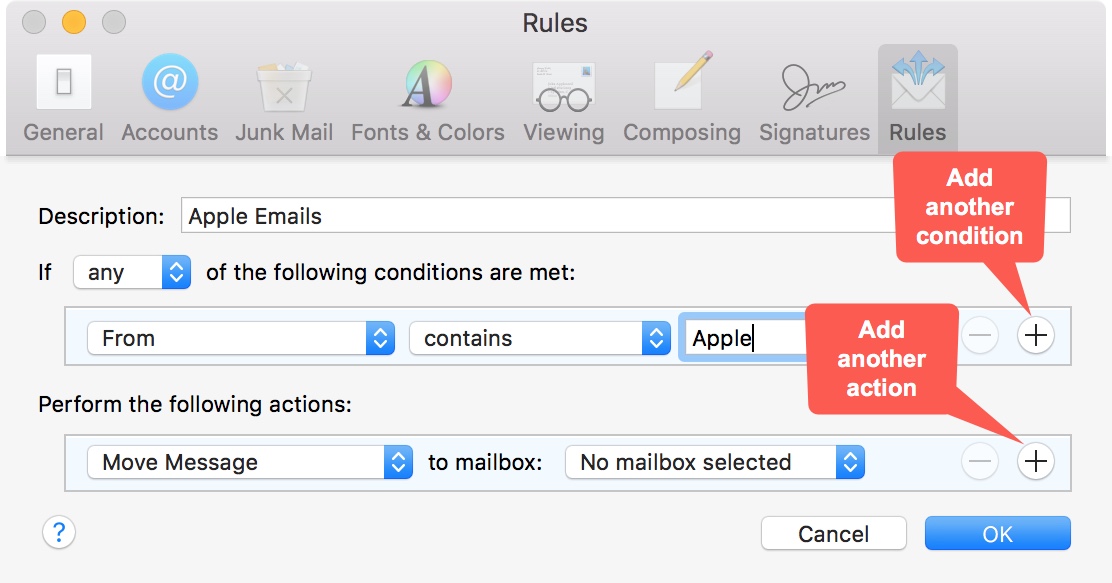
You may need decide what the message should contain, not contain, begins with, ends with, or is equal to. Follow that by entering text into the third box. So, you could enter something like “From contains the word Apple” or “Subject contains the word Sale”.
Set up the actions
After you have set up the conditions for the incoming email, you decide what actions should be taken. Choose from options like:
- Move the message to another mailbox or folder
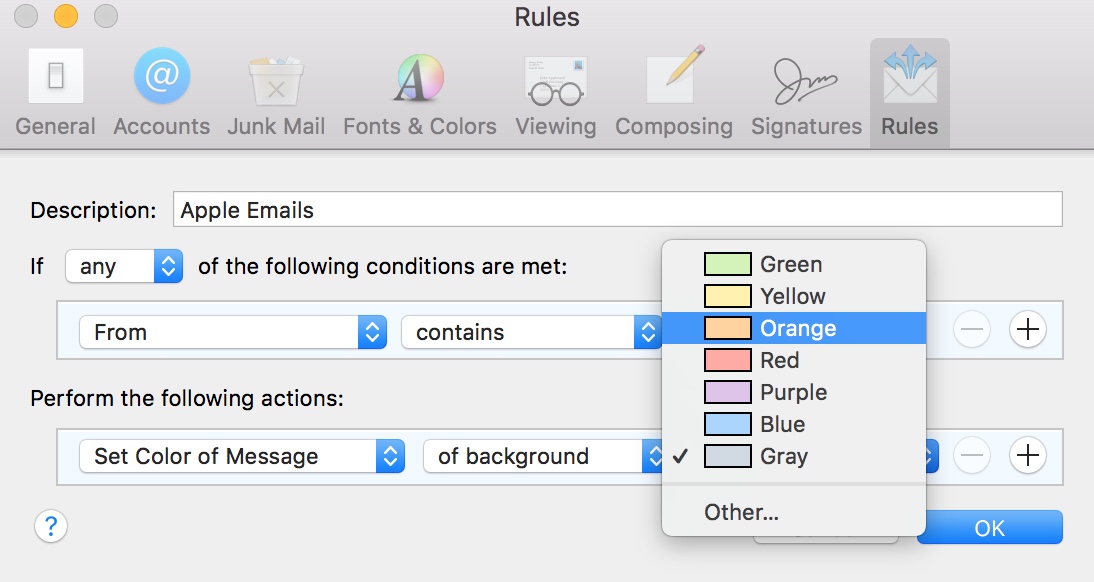
- Set the color of the message
- Automatically reply to or forward the message
- Delete the message
- Mark the message as read
Just like with the conditions you set up, the actions may ask for more details. If you pick Move Message, you must choose the mailbox and folder. Or, if you select Set Color of Message, you need to pick the color and whether it should apply to the background or text.
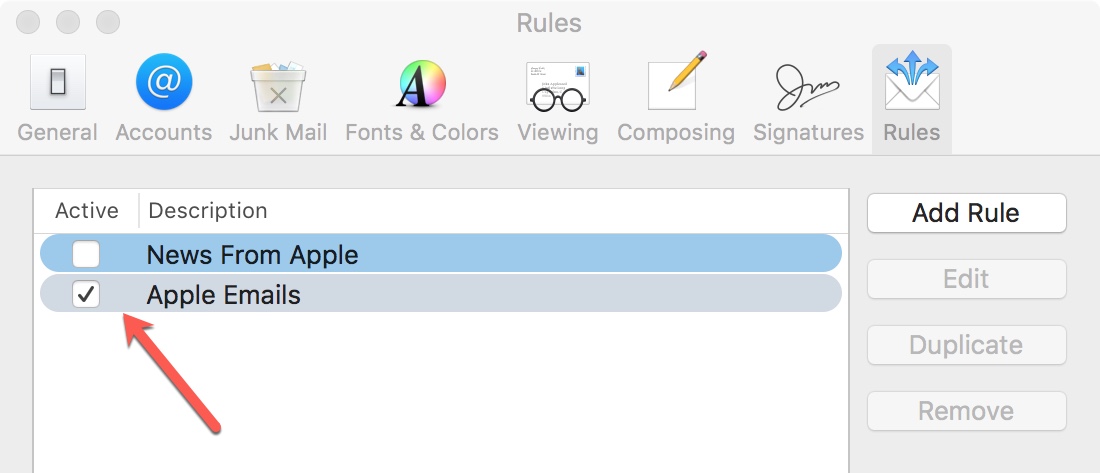
Once you have your description, conditions, and actions set, click OK and your new rule is ready to go. You will then see it in your list of Rules in the Preferences box.
If you ever want to change a rule, select it and click Edit. You can also click Duplicate to copy a rule and then make slight changes or Remove a rule you no longer need.
Example Rules
Not sure how these Rules can help you? Here are a few examples.
- Move messages from your boss to your work folder.
- Receive notifications when you get messages from your mom.
- Automatically flag and reply to messages marked as high priority.
- Automatically delete messages with certain words in the subject.
- Play a sound when emails containing media attachments arrive.
As you can see, Rules can not only help you organize your inbox by moving or deleting messages, but also receive notifications for important ones or automatically flag messages making them easier to spot.
Plus, you can set up more than one set of conditions and actions for a message using the plus signs in those sections to add more.