When importing songs into desktop iTunes, check your settings to ensure the media-management app is not set to create copies of any imported items in your library.
I have a ton of music on my computer that I ripped from my personal CD collection.
It isn’t uncommon for some people to have a vast music/video collection spanning multiple volumes or external disks. As you know, iTunes doesn’t automagically know about your media unless you import the items so they appear in your library.
The iTunes library is an .ITL file in your iTunes folder that the computer uses to keep track of your imported media and meta data such as play counts, ratings and more.
When importing music from a CD, the files get automatically added to the iTunes Media folder.
When you add MP3s another way—i.e. choosing the Add to Library option from the File menu or by dragging them into iTunes—iTunes may or may not create copies of your source files. If it’s set to copy imports in the media folder, iTunes keeps your originals intact. You can even delete any imported files in their original locations because iTunes now has copies.
Some users are unaware that for each imported item iTunes may create a copy. Thankfully, you can reclaim your precious storage space lost to these duplicates with a few clicks.
Here’s how to switch to a referenced iTunes library that doesn’t create duplicates when importing stuff that’s already stored somewhere on your computer.
How to use iTunes in referenced library mode
Follow these steps to put your iTunes in referenced library mode:
1) Open iTunes on your Mac or Windows PC.
2) Choose Preferences from the iTunes menu (Mac) or the Edit menu (Windows).
3) Click the tab labeled Advanced.
4) Untick the box next to “Copy files to iTunes Media folder when adding to library.”
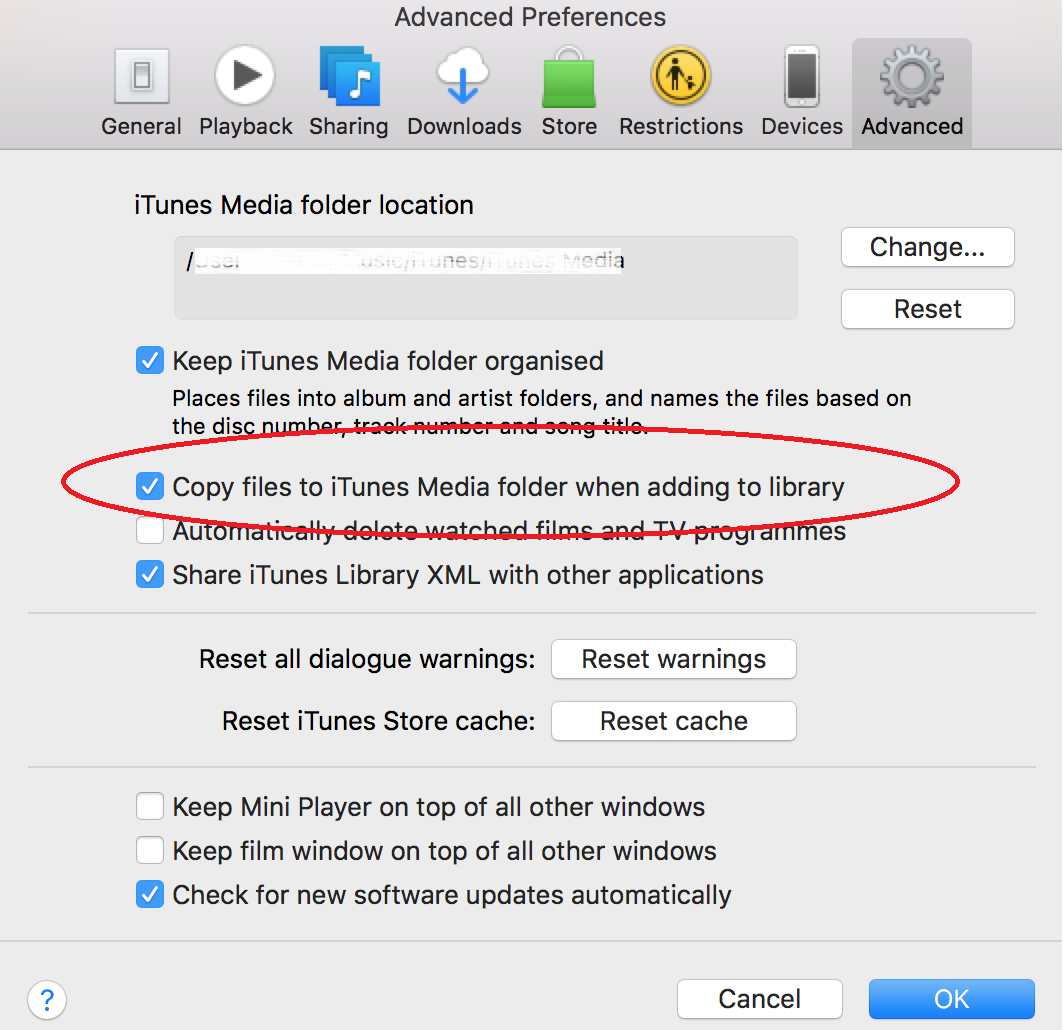
TIP: Hold down the Option (⌥) key while you drag files to the iTunes window to temporarily override this setting.
Now when you import an item to iTunes, a reference (or pointer) to the item is created rather than a copy of the item itself. Referenced library mode is great if you prefer manual file management and organization without worrying about duplicates.
I like to meticulously nest my music and other media manually into multiple sub-folders. I find it easier to manage, copy, share and back up my media this way, so I’m using iTunes in referenced library mode.
This mode should be indispensable to those of you who prefer to keep multi-gigabyte video files on an external disk rather than in the iTunes Media folder on your computer.
Consolidating your iTunes library
If you use a referenced library, it’s easy to forget that moving the original files to another folder or disk will confuse iTunes because it expects them in the old locations. This is a major issue when moving your library to a new computer or an external drive. Thankfully, that’s what the library consolidation feature was designed for.
Consolidating your library keeps the originals in their original location and creates copies placed in the iTunes Media folder. This lets you safely move your iTunes folder to a new computer or external disk without losing anything.
Here’s how to consolidate your iTunes library
1) Open iTunes on your Mac or Windows PC.
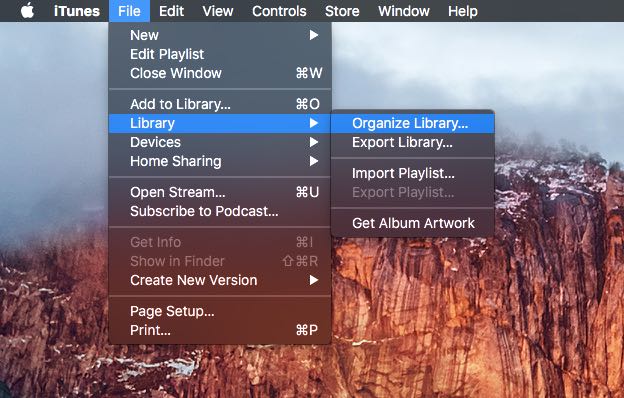
2) Click the File menu, then choose Library → Organize Library.
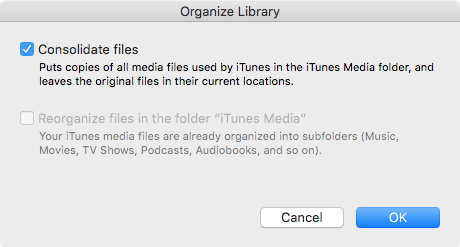
3) Tick the option labeled “Consolidate files”.
TIP: To have your media files organized into sub-folders (like Music, Movies, Podcasts and so forth), tick the option labeled “Reorganize files in the folder iTunes Media”.
4) Click OK to continue.
Any referenced items will be copied into appropriate sub-folders in your iTunes Media folder.
This may take a while depending on the number of the source files being consolidated, their size, the speed of your computer, available storage space and other factors.
By default, the iTunes Media folder lives in your account’s Music folder on Mac and in My Documents/My Music/iTunes on Windows. To see where your iTunes Media folder is currently located, access iTunes’ preferences, click the Advanced tab and look for the location under the section labeled “iTunes Media folder location.”
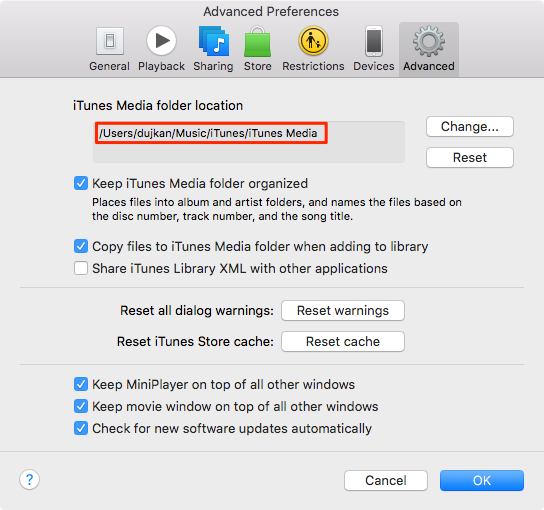
To set a custom location, click Change and choose a folder for imports.
This will not automatically move any of your previously imported files to the new location unless you consolidate the library. To revert to storing imported items in the default iTunes folder, choose iTunes preferences, select the Advanced tab and click Reset.