
FaceTime has made it incredibly easier to keep in touch with loved ones. The simplicity and the immediacy of the app have made it one of the most used applications in our household, especially because we live overseas and don’t get to see our family in person very often.
FaceTime conversations are ephemeral though. As soon as you hang up, that moment spent with friends and family is gone forever, except in our minds where memories of that conversation may live on for a few days, and then slowly fade away.
There are special moments spent on FaceTime that we’d like to keep forever, such as when we’re doing a video call with the grandparents while the kids are opening their gifts on Christmas Day, or when wishing a very happy 98th birthday to Great Grandpa. FaceTime allows us to spend these moments together, but not record them or keep a digital copy of them like we would with a video.
If you want to keep a recording of specific conversations, we’re going to show you how you can record FaceTime calls on your iPhone, iPad, and Mac.
How to record FaceTime calls on Mac
1) Open the FaceTime app on your Mac.
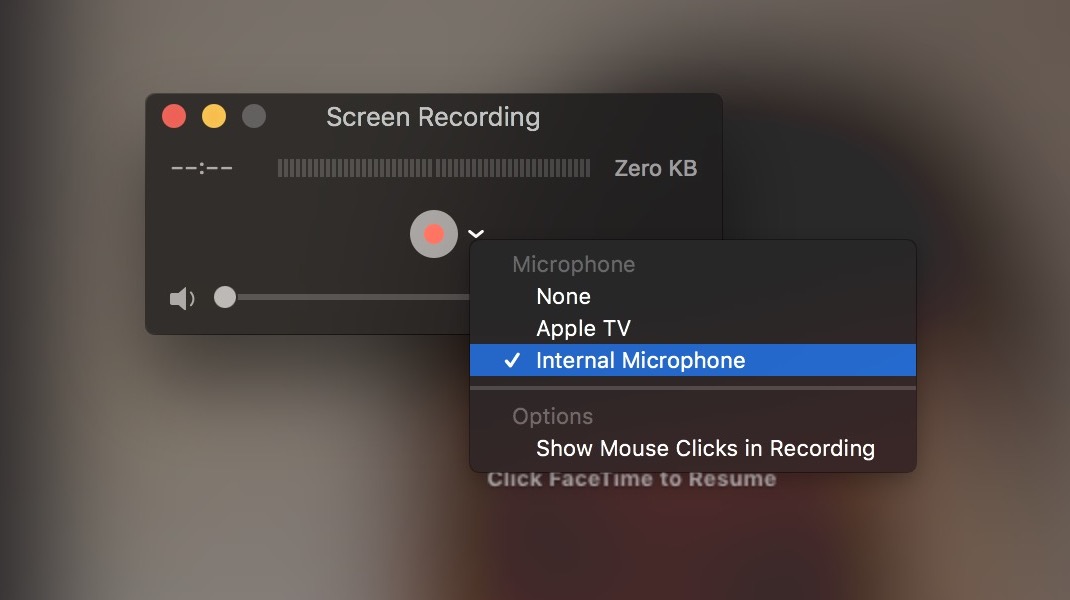
2) Open the QuickTime app on your Mac as well, and with this app in the foreground, go to File > New Screen Recording. The trick is that we’re going to do a screen capture of the FaceTime video call as it happens on your computer.
3) Click on the little arrow down button in the QuickTime window and select the microphone you want to use to record your sound. Unless you have some fancy microphone plugged in, you’ll most likely use the Internal Microphone.
4) You will now get the option to record either the entire computer screen, or just parts of it. If you’re going to put FaceTime in full screen on your Mac, then it might be a better idea to record the entire screen, in which case, simply click anywhere on the screen. If you just want to record a specific section of the screen, use your mouse to drag a recording area on your screen. As soon as you release the mouse, the screen recording will start.

5) Start your FaceTime conversation by calling your friend or family member.
6) Once the conversation is hover, hangup the call and click the Stop button located in the menu bar of your Mac.
7) QuickTime will automatically bring the video recording you just made to the foreground. From there, you will be able to watch it and save to your computer by going to File > Save.
How to record FaceTime calls on iPhone and iPad
Despite Apple adding the option to record the screen of your iPhone or iPad in iOS 11, you aren’t able to record sound, so this defeats the purpose of our goal. To overcome this limitation, we have to employ the same finicky technique as described above, albeit in a slightly different way.
1) Plug your iPhone or iPad into your Mac using the USB to Lightning cable. Make sure your device is unlocked and the Home screen is visible.
2) Launch the QuickTime app on your Mac.
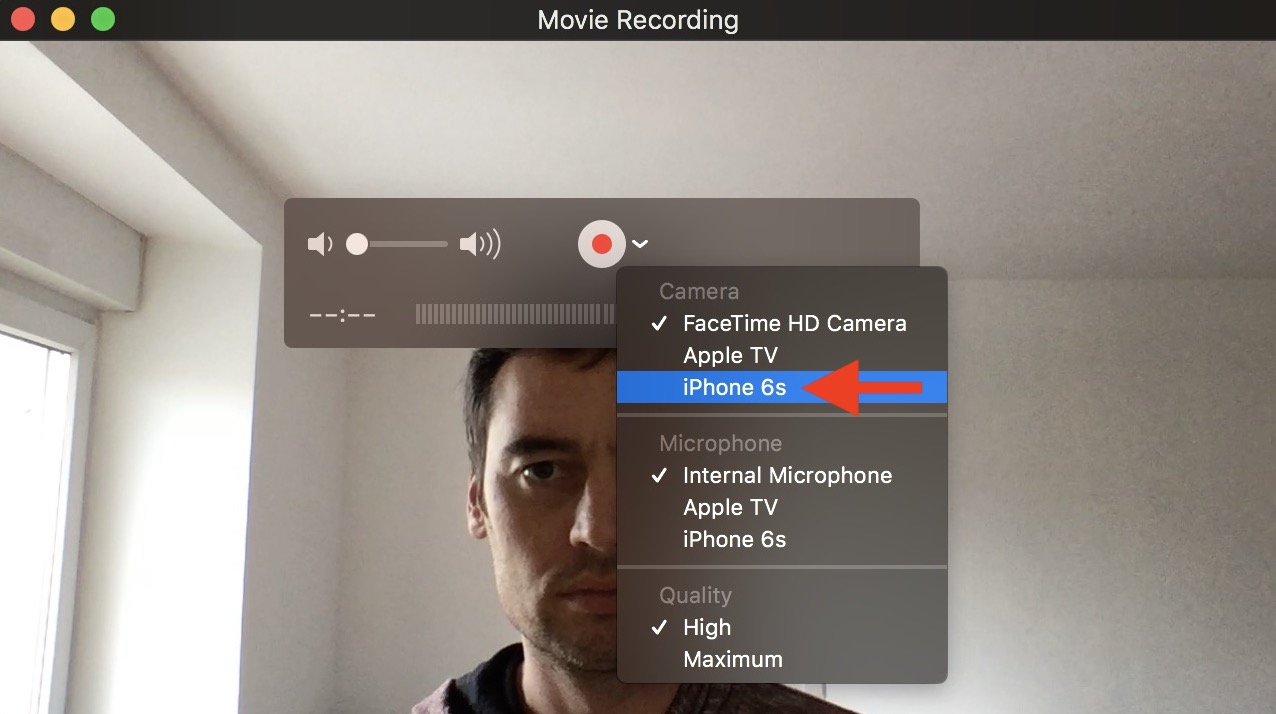
3) With QuickTime as the active app, go to File > New Movie Recording.
4) In the window that appears, click on the arrow down button and make sure to select your iPhone or iPad under the Camera section. By doing this, we are actually telling QuickTime to record what is happening on the screen of your iPhone or iPad.
5) Click on the red recording button in QuickTime, then start your FaceTime call.
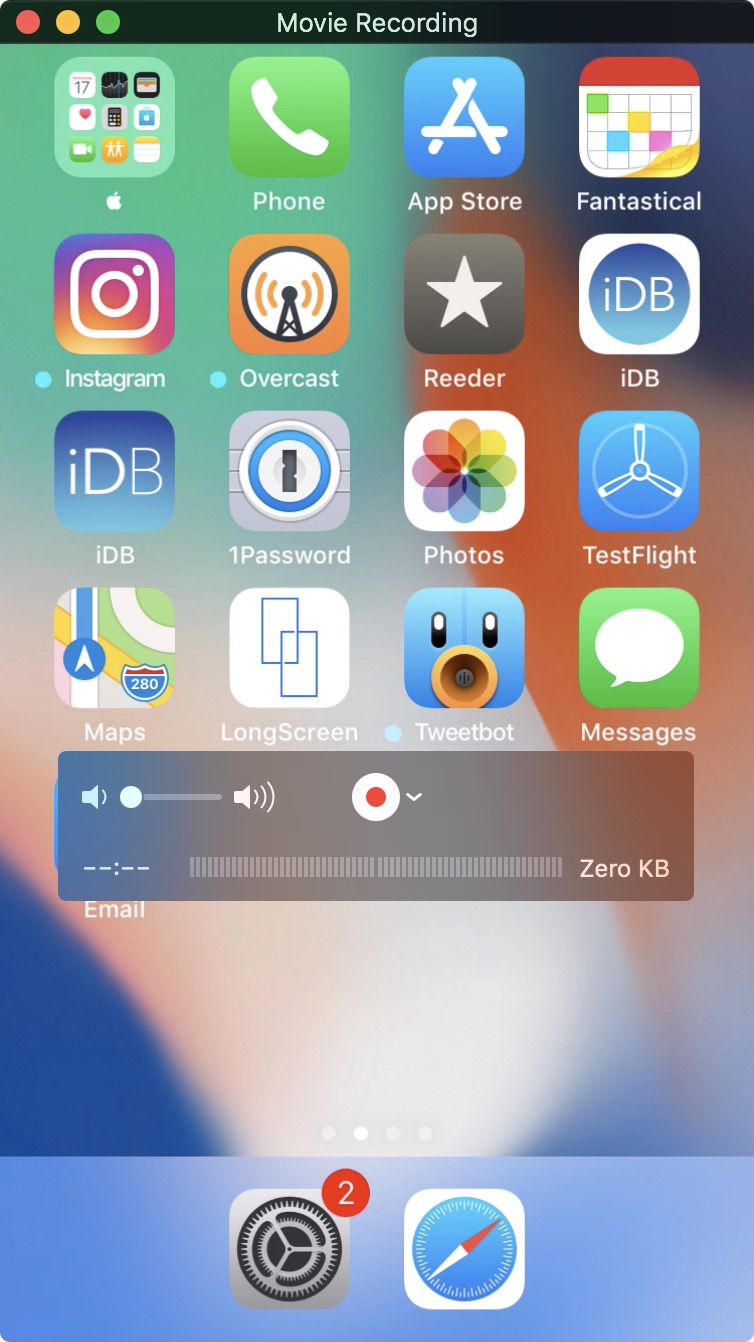
6) When you’re done with the call, hang up, then click the same button to stop the recording. Your FaceTime recording will be available immediately. From there, simply go to File > Save in order to save the recording to your computer.
Recording a FaceTime call on your iPhone or Mac isn’t really complicated, but it does require jumping through a few hoops. My guess is Apple isn’t making it easier to record FaceTime video calls for privacy reasons. Until they change their mind, the methods described above will have to do.