If you’ve ever tried to send a group of contacts to someone from your iPhone before, then you’ve probably noticed there’s no easy way to do it out of the box.
While sending a group of contacts all at once requires the help of a third-party app, it’s certainly possible to do. We’ll show you how to do it in this tutorial.
Why to share a contact group
There are a few reasons why you might want to send a group of contacts in the first place. To start, you have to understand what a contact group is.
Apple lets you group your contacts based on how you identify with them. For example, you might have a group of contacts that are primarily people from work, as well as another group of contacts that are primarily people from school, etc.
Hypothetically, if someone you work with is new to the job and asks you for the contact information of your fellow employees, then it will be more convenient to send them an entire contact group containing all of your work contacts rather than it would be to send each contact one by one.
Similar scenarios can be considered when:
- A school project partner asks you for contact information for other students in your group
- A family member asks for contact information for other family members
- And so on…
To sum it all up, the reason you would want to send a contact group is because it’s quicker, easier, and less cumbersome than going down the list of your contacts and sending each one individually. With that in mind, knowing how to send a group of contacts all at once is a good skill to know.
How to do it
To send a group of contacts from your iPhone or iPad, you will need to use a third-party app. We recommend Connect, a contact manager for iOS that can be downloaded for free from the App Store.
Adding contacts to groups
If you haven’t already set up a contact group for the group of contacts you wish to share, then the first thing you will have to do is set one up. To do that from the Connect app, follow these steps:
1) Launch the Connect app from your Home screen and grant the app Contacts access if you haven’t already.
2) Tap on the Contacts tab at the bottom of the app.
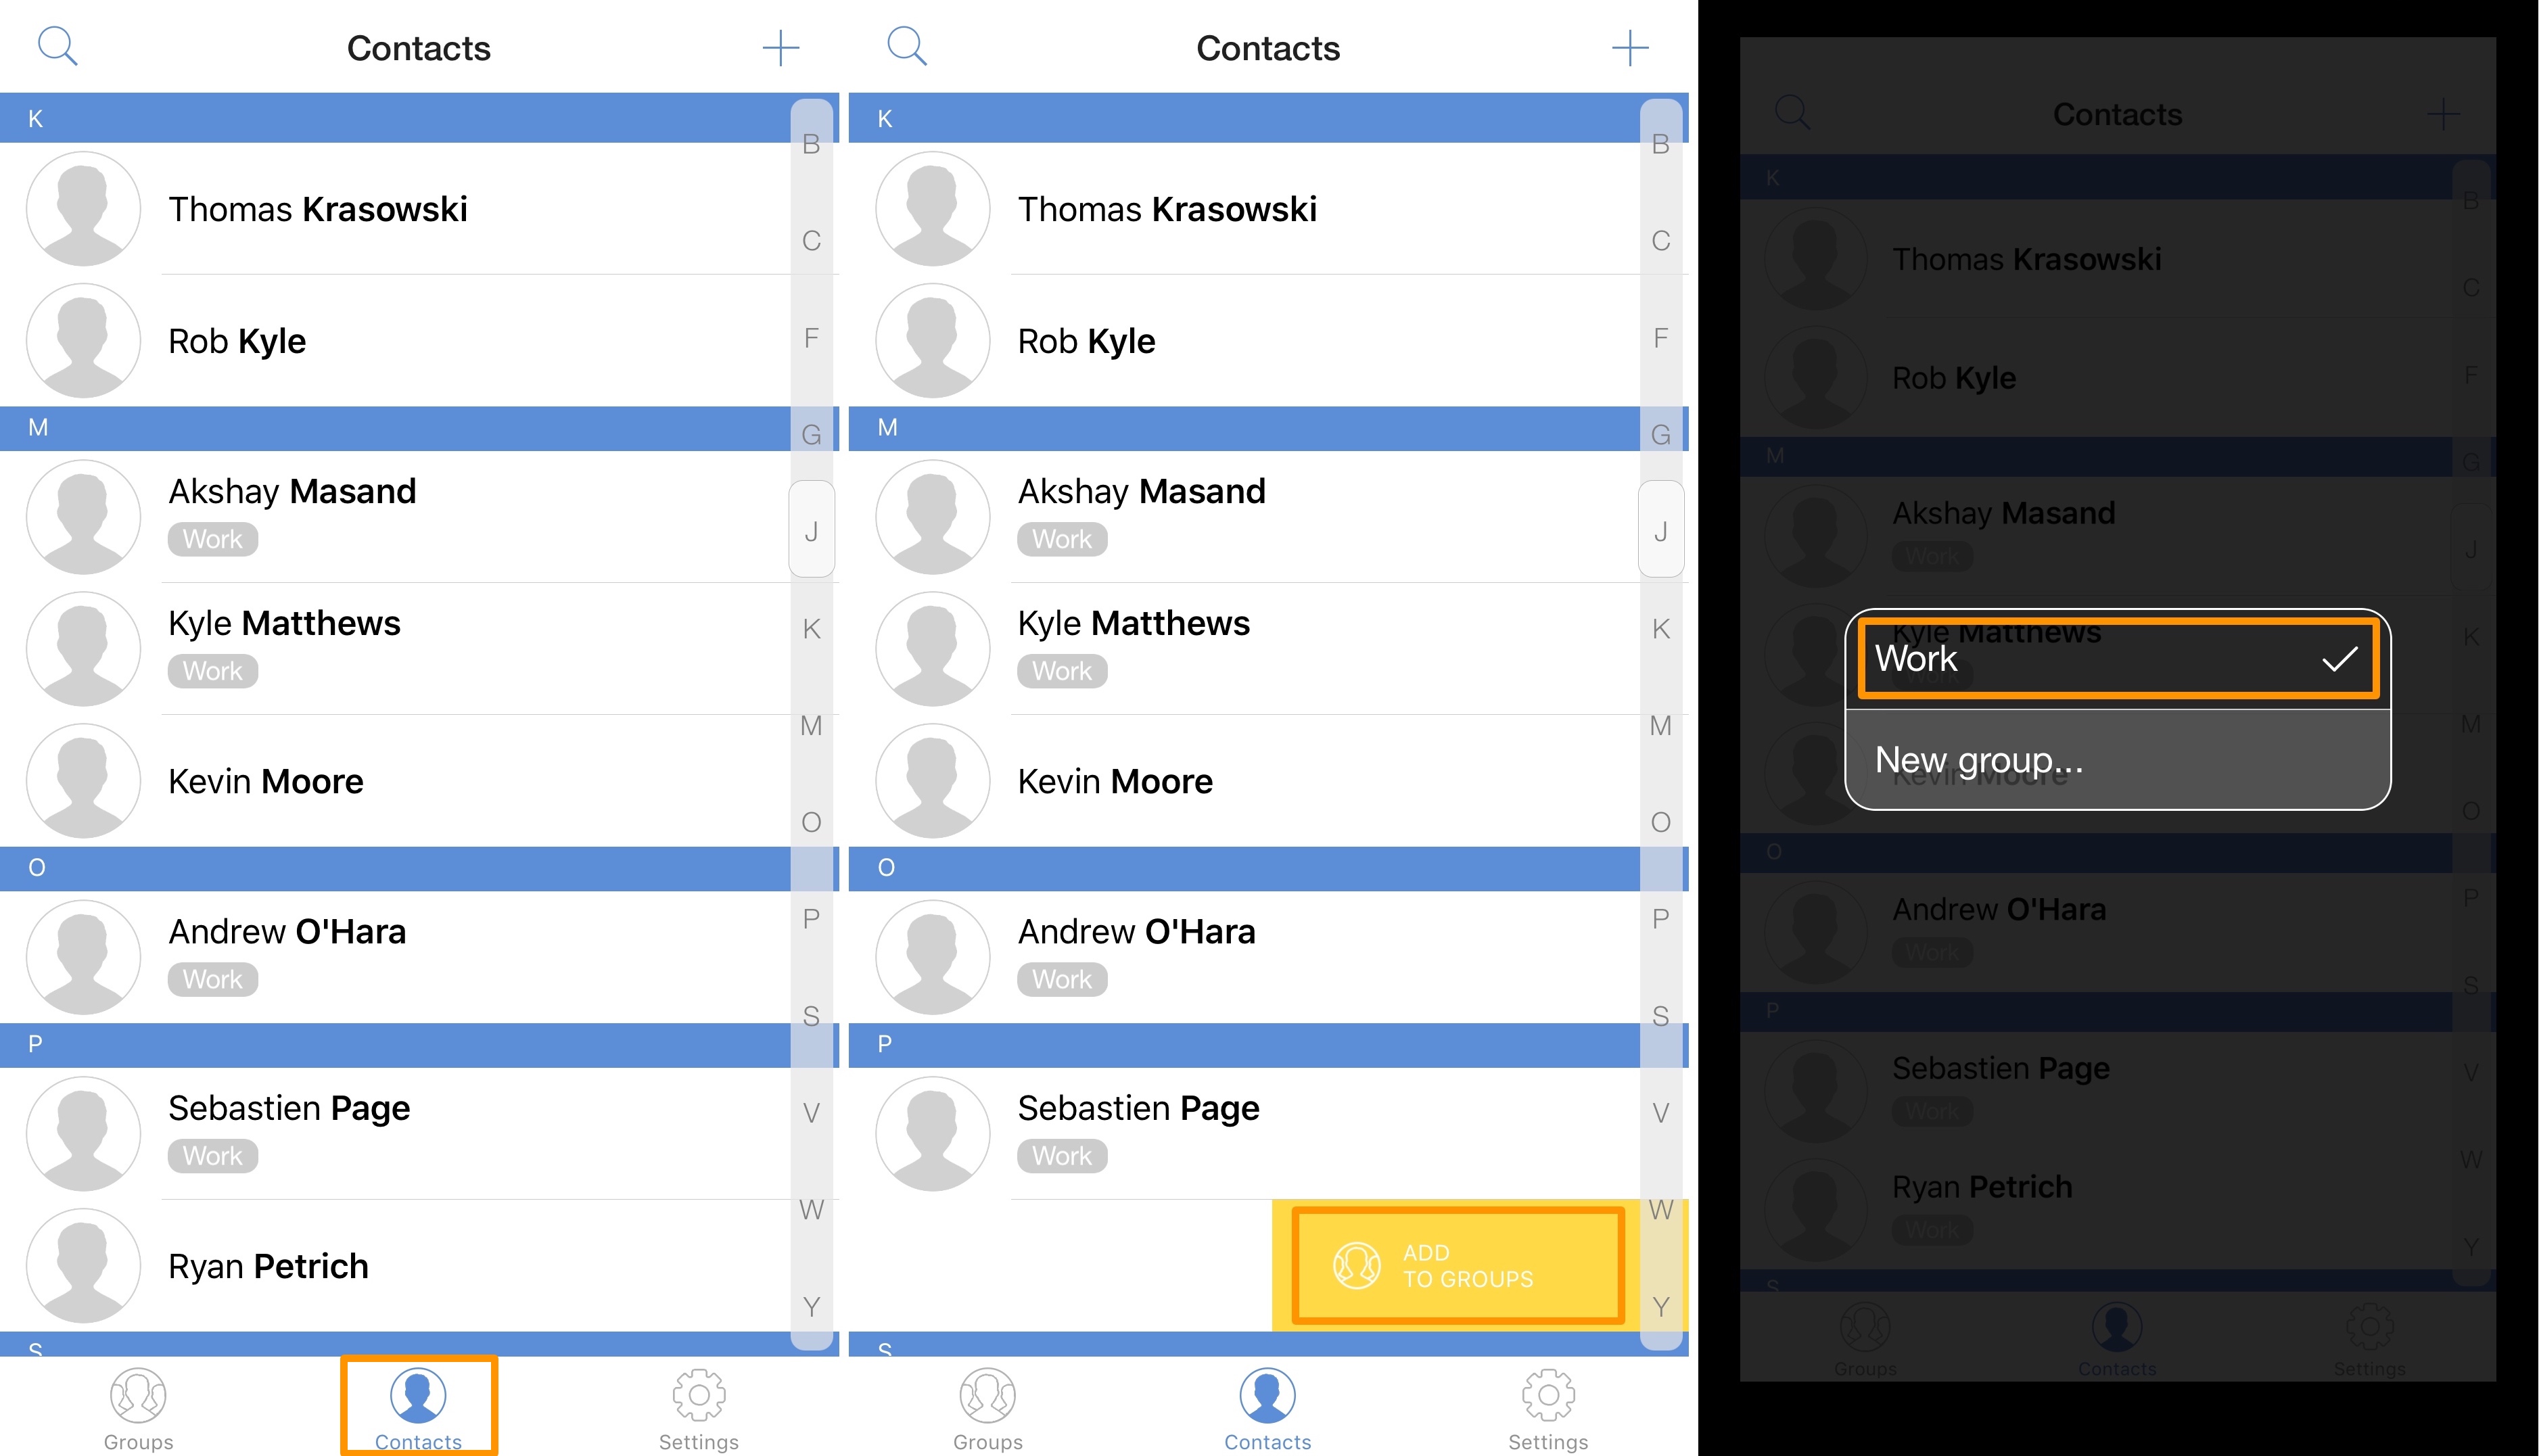
3) Find a contact you want to add to a contact group and then swipe left on that contact’s name. When you see the yellow Add to groups indicator, let go of your screen.
4) In the pop-up you see next, either select an existing group to add the contact to or tap on the New group… button to make a new one to add the contact to.
5) Once you add a contact to a contact group, repeat steps 3-4 for each additional contact you wish to add until satisfied.
How to share a contact group on iPhone or iPad
After setting up a new contact group or modifying an existing one, you’re ready to share it. To do that, follow these steps:
1) Launch the Connect app from your Home screen if you’re not already in it from the previous steps.
2) Tap on the Groups tab at the bottom of the app.

3) Tap and hold on the name of the contact group (from the top of the app) that you wish to share with somebody.
4) In the menu of options, tap on the Share button in the bottom left corner.
5) Select all the contacts in the contact group you wish to share.
Note: This is your opportunity to exclude certain people from the share, which might be necessary if someone doesn’t wish to have their phone number shared with others.
6) When satisfied with your selection, tap on the blue OK button at the top right of the app.
7) In the pop-up, tap on either message or email as your method of share.
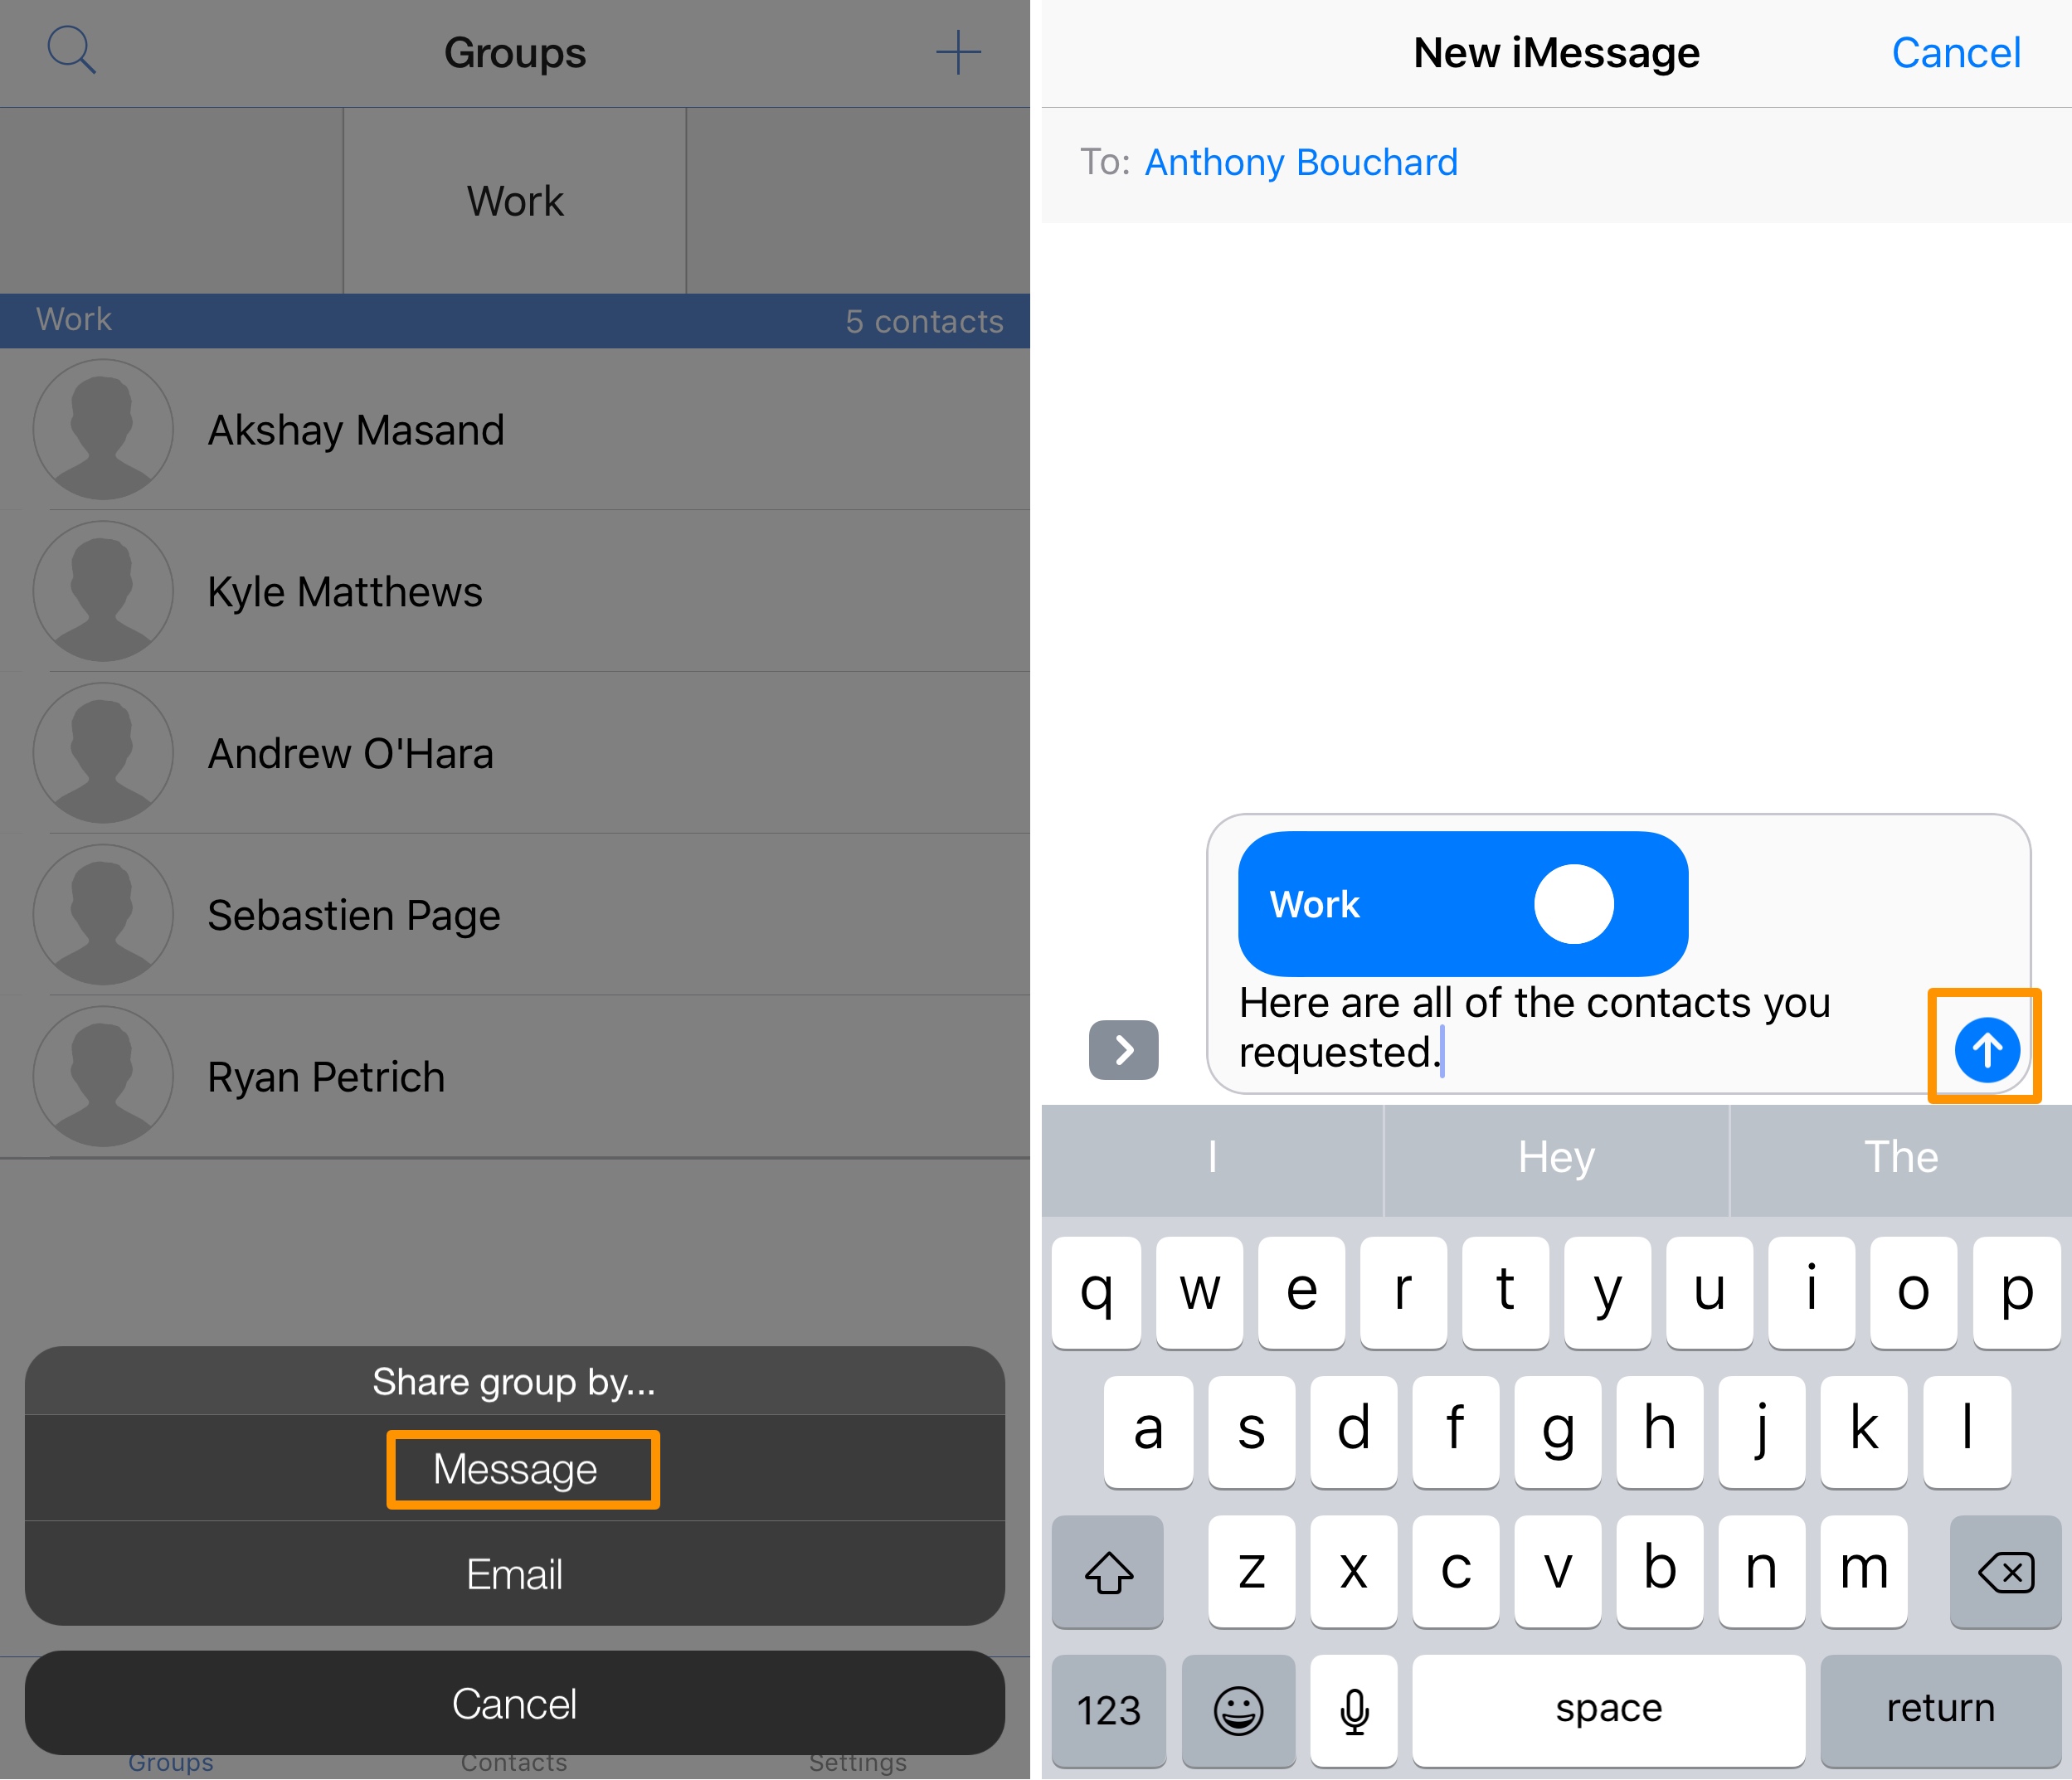
Note: We will use text message for this tutorial’s purposes.
8) Add a small message to your contact group attachment so the recipient knows what they’re getting, and then tap on the Send button.
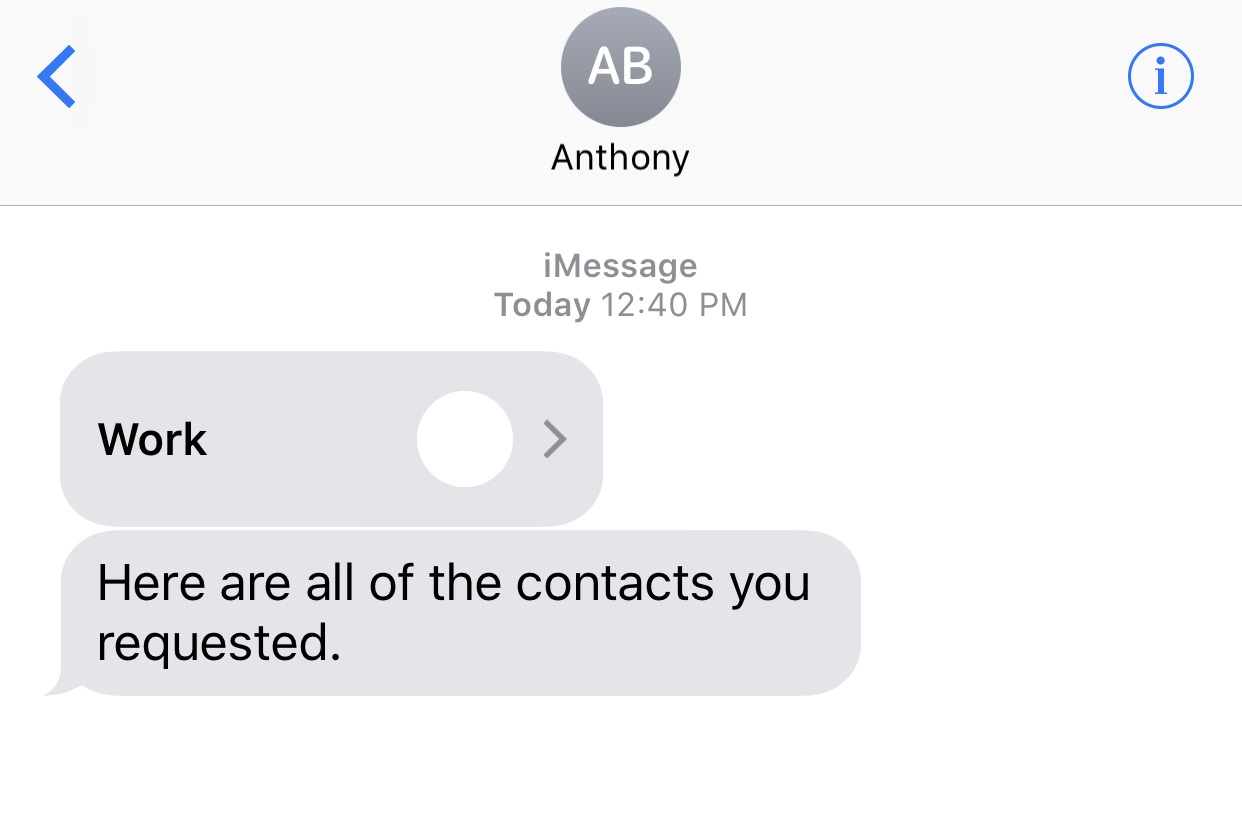
The recipient will get a message with the contact group attachment, which looks like this:
Wrapping up
Unfortunately, iOS doesn’t support sending groups of contacts to people out of the box. Nevertheless, using the Connect app is a quick and convenient workaround until Apple actually wakes up and smells the roses.
Have you ever needed to share a contact group with someone before? Share in the comments!