
WhatsApp for iPhone supports sharing of photos, videos, animated GIFs and more via Snapchat Stories-like slideshows that automatically disappear after 24 hours. Media-rich statuses are all the rage these days so we’ve decided to put together a tutorial to get you up to speed.
You can adjust who is allowed to see your auto-vanishing statuses, reply to a status update, delete a status manually, mute statuses you don’t like and more.
In this step-by-step tutorial, we’ll tell you everything there’s to know about WhatsApp’s multimedia status updates.
Say hello to your media-rich WhatsApp status
WhatsApp creators started writing the first lines of code for what would eventually become the killer messaging app back in February 2009. “The original idea behind the project was to build an application that lets your friends and other contacts know what you’re up to,” according to WhatsApp.
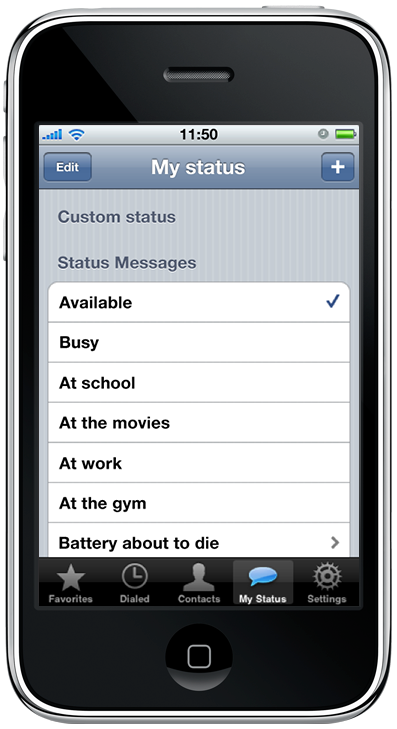
The very first version of WhatsApp for iPhone.
This was months before they even added messaging, mind you. Eight years later, in February 2017, WhatsApp creators have overhauled the app’s text-only statuses with end-to-end encrypted multimedia updates that can include photos, videos, animated GIFs, emojis, text, drawings and more.
How to create status updates on WhatsApp
To add your own multimedia status update on WhatsApp, do this:
1) Tap the Status tab at the bottom of WhatsApp.
2) Tap the Add Status icon in the top-right corner, it looks like a circle with a + symbol.
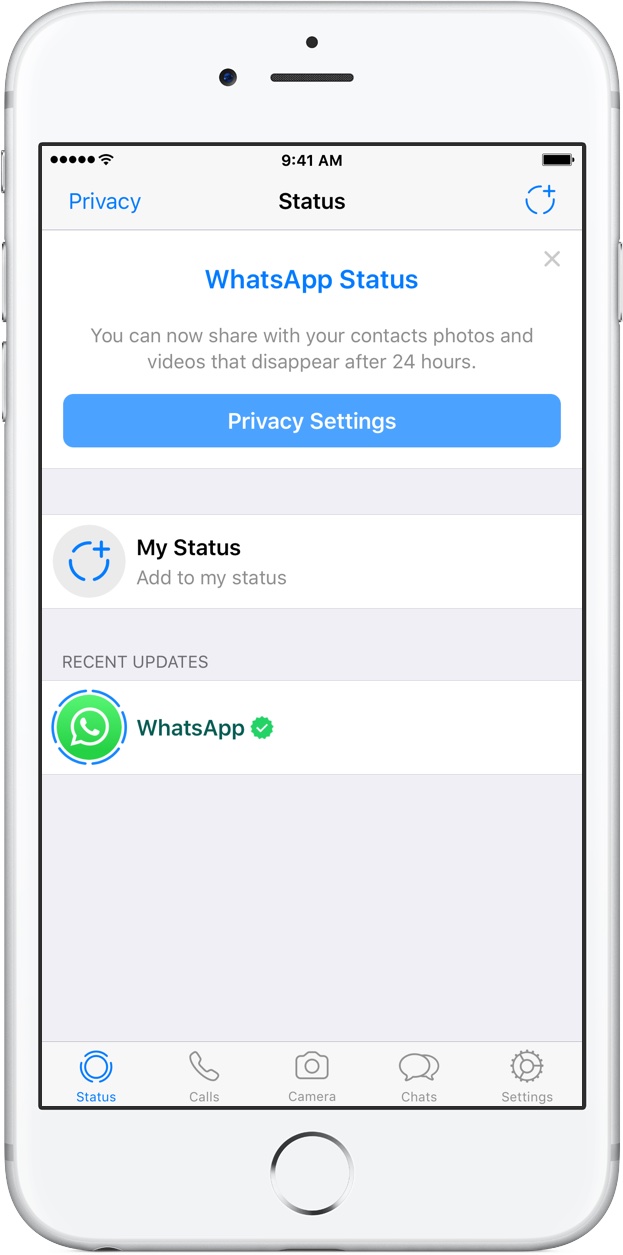
If this is your first time using the feature, you’ll be greeted with a splash screen providing basic information about creating auto-vanishing statuses along with a test status from the WhatsApp team.
3) WhatsApp’s media picker pops up, allowing you to take a new photo/video or select an existing item from your media library, as described below. You can also add animated GIFs to your statuses.
- Take photo/video—Hold the Shutter button to record a video or tap it to quickly snap a photo. Tap the Camera icon in the bottom-right corner to toggle between front and rear cameras. Turn flash on and off by tapping its icon in the top-right corner.
- Use existing photo/video—Swipe left and right on the thumbnail strip alongside the bottom to quickly select an existing photo or video (drag the chevron up if you don’t see the strip). Alternatively, hit the Library button in the bottom-left corner to browse your entire Photos library in fullscreen mode.
- Add GIF—In the Photos browser, tap the GIF button in the bottom-left corner to select animated GIFs from GIPHY. Find the right GIF for the occasion by entering custom keywords in the search field at the top.
To quit the media picker at any time, tap X in the upper-left corner.
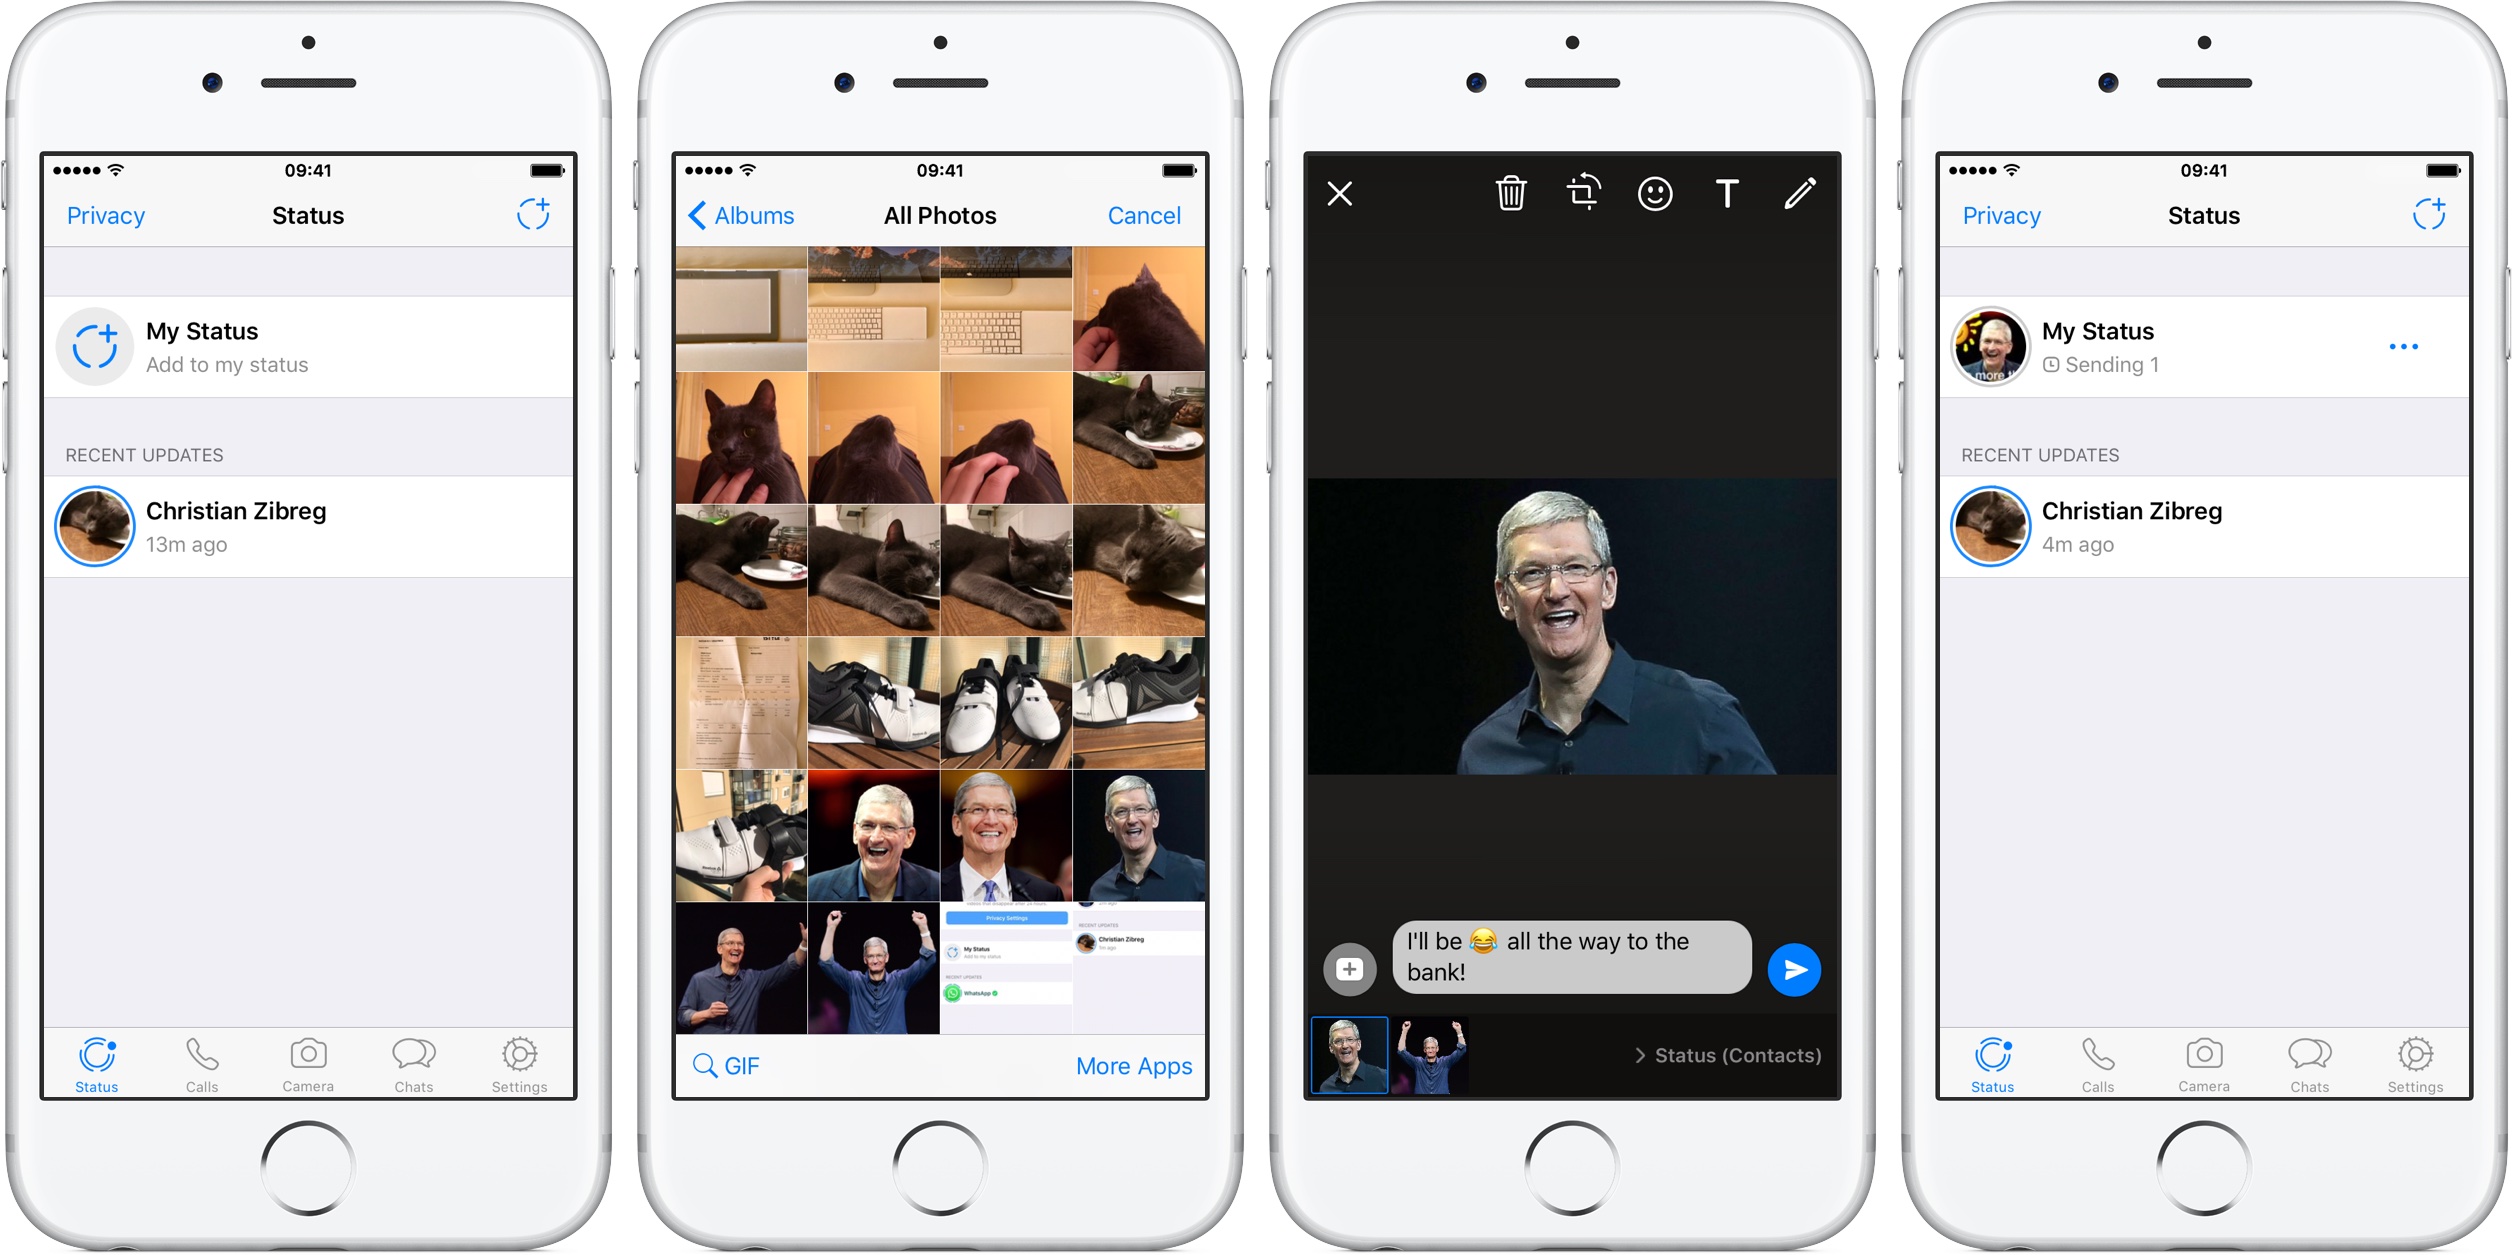
Tip: Hit the Plus icon to the left of the caption field to select additional media items.
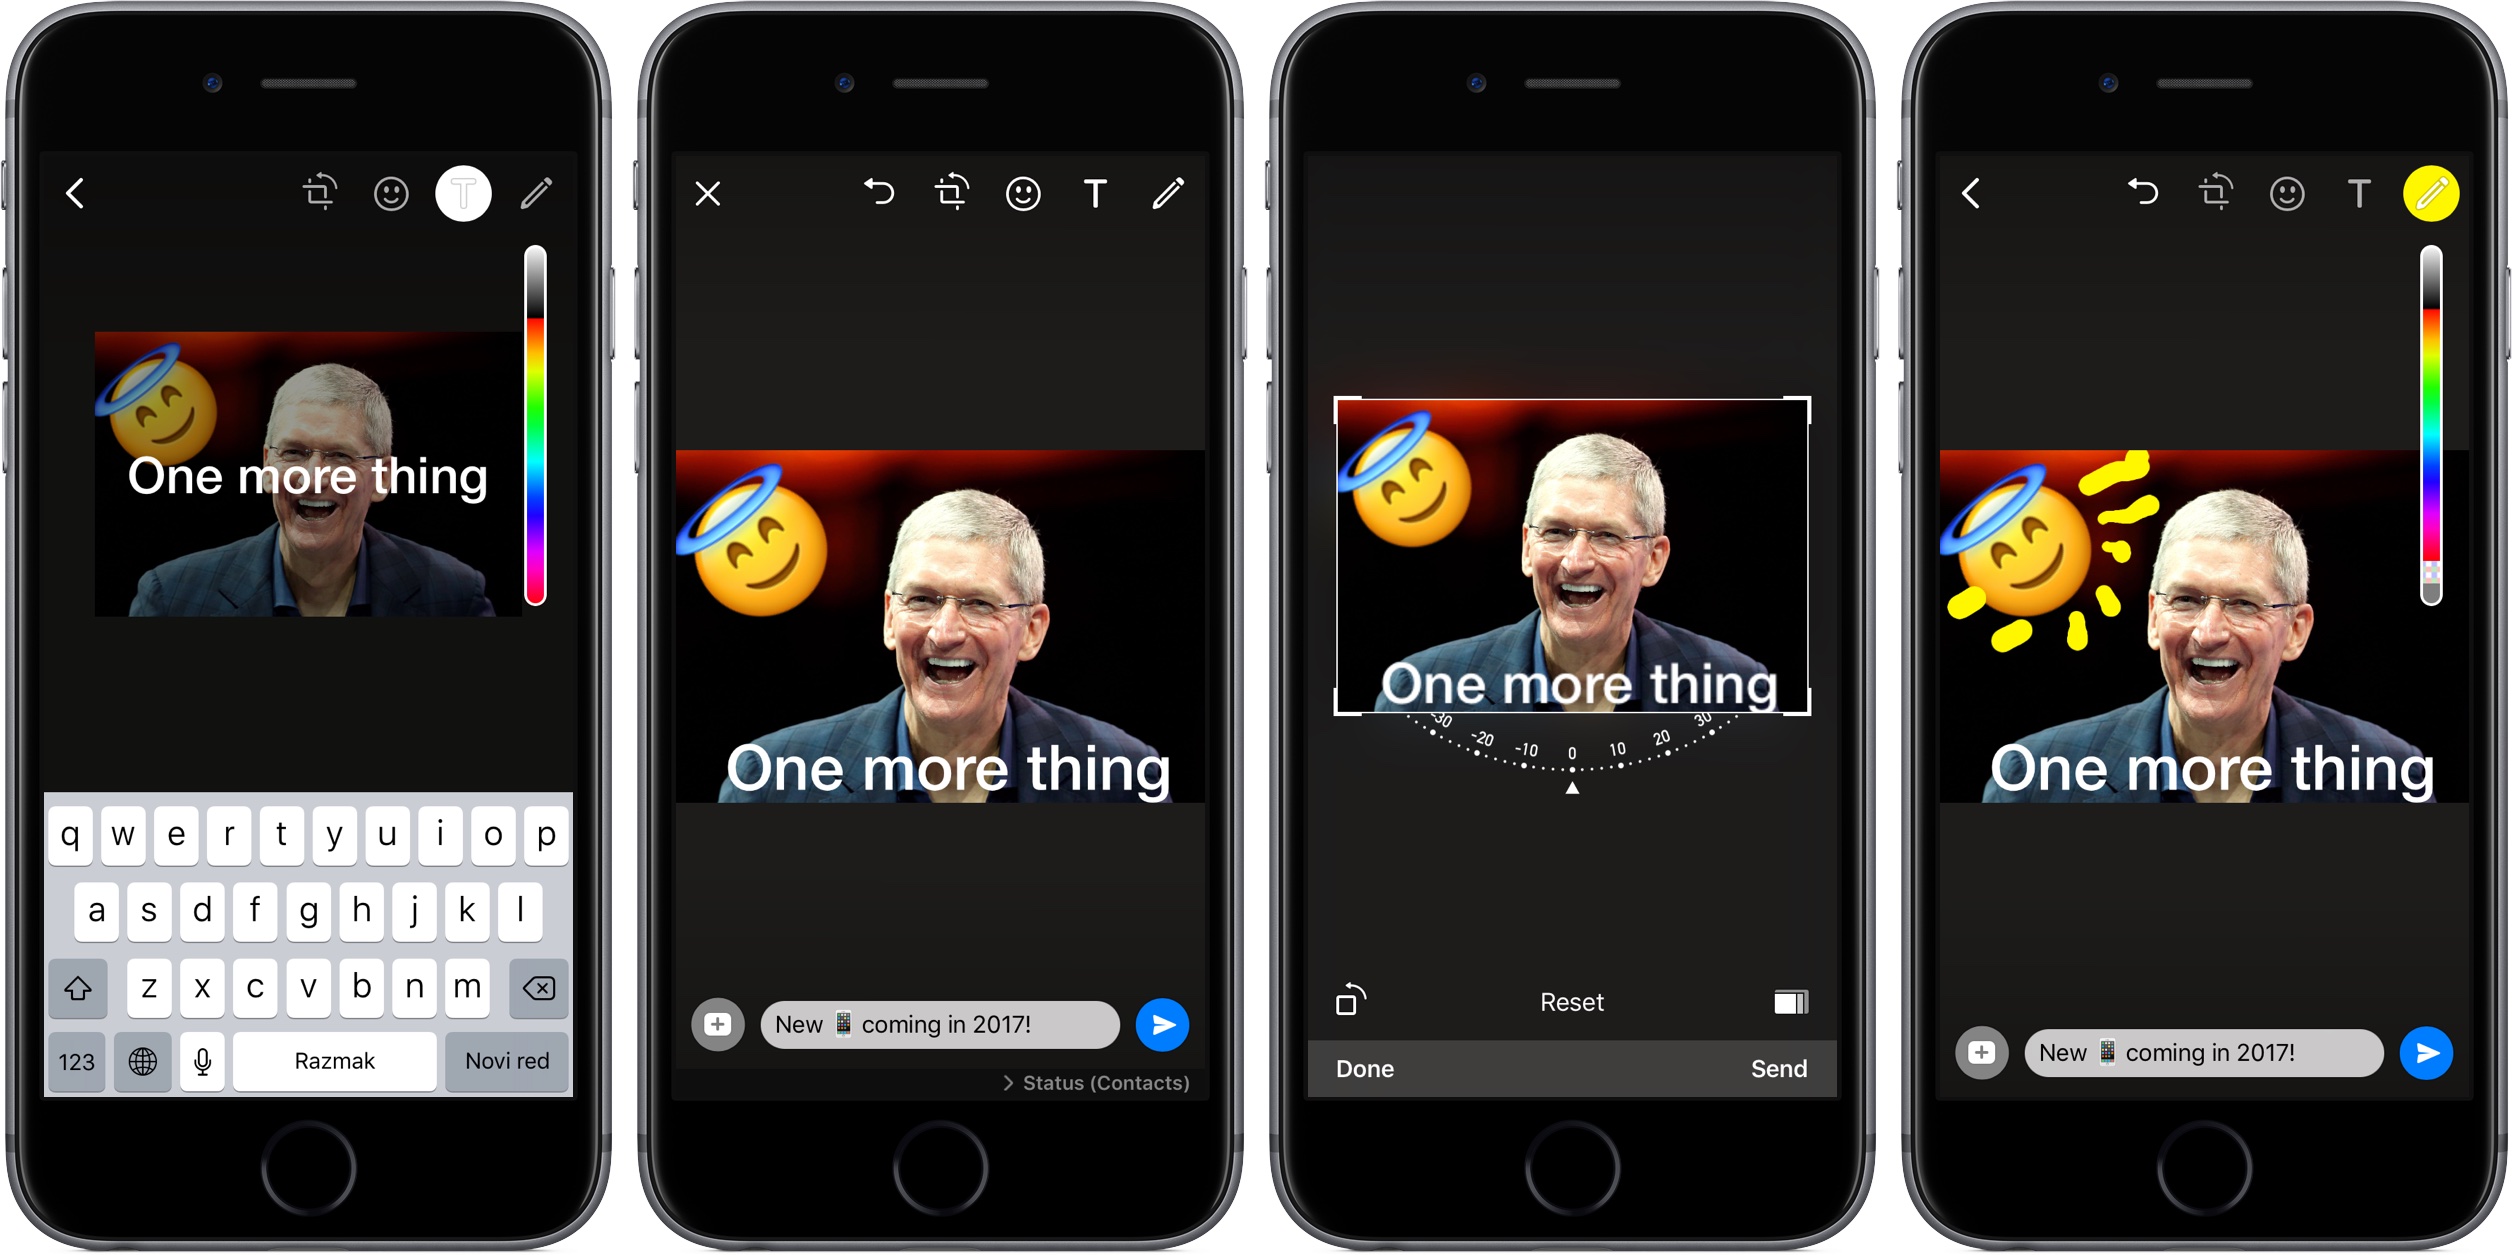
4) Now personalize your photos and videos. Feel free to write captions, draw, add text or use emojis to spice up your media. Please keep in mind that these features are only available on iPhone 5s or later and iOS 9 or later.
- Add emojis—Tap the Emoji button in the top, then tap to select an emoji. Hold down on the emoji to drag it to anywhere you like, use pinching to make it smaller or larger or pinch and turn to rotate the emoji. Tap the Emoji button again to finish editing.
- Add text—Tap the T button in the top to add some text. Choose a color by sliding your finger up and down the color selector on the right. To change the typeface, slide the finger from the color selector on the right to the left, then let go to use the selected font type. Use pinching to resize your text, or pinch and turn to rotate it. To finish adding text, tap the Text button again.
- Draw freehand—Tap the Pencil icon in the top-right corner, then draw freehand on the photo or video. To pick a color, slide your finger up and down the color selector on the right. You can select the color for each individual object you draw. To turn areas of the image black and white, slide your finger to the very bottom of the color selector, then draw. Select the checkerboard pattern near the bottom of the color selector to pixelate parts of the image you’d like to hide. Tap the Pencil icon again to apply changes and exit this screen.
- Crop photos—Tap the Crop button in the top to use WhatsApp’s cropping features. Spin the wheel to rotate the image or drag the handles in each corner to crop out unwanted parts. Tap Rotate in the bottom-left corner to rotate the image by 90 degrees or hit the Presets icon in the bottom-right corner to apply one of the built-in cropping presets. Hit Done to finish making changes or Reset to discard your edits.
You can discard the changes made to your desired emojis, text or drawings at any time. To discard emojis and text, drag them to the screen top towards the Trashcan icon, then let go. To delete your drawings, tap the back arrow icon in the top. Lastly, tap Undo in the top to revert any changes you’ve made to your emojis, text or drawings.
Tip: Every photo, video or GIF you add to your status can have a caption.
If you’ve selected multiple media items for your status, create a caption for each by tapping a desired thumbnail at the bottom. Tapping and holding a thumbnail enters jiggle mode, which lets you rearrange your media to adjust the order in which the items appear in your published status.
5) Tap the blue Send button in the bottom-right corner to add the selected photos, videos or GIFs along with any emojis, text, drawings or edits you’ve made as your new WhatsApp status.
Congratulations, you’ve just created your first media-rich status update on WhatsApp!
As mentioned, these statuses automatically disappear after 24 hours. By default, your statuses are set to be shared with all your contacts, but you can choose to share them with selected contacts only by adjusting your privacy settings.
How to view status updates on WhatsApp
1) Tap the Status tab at the bottom of WhatsApp.
2) Statuses from your contacts are listed underneath the Recent Updates heading.
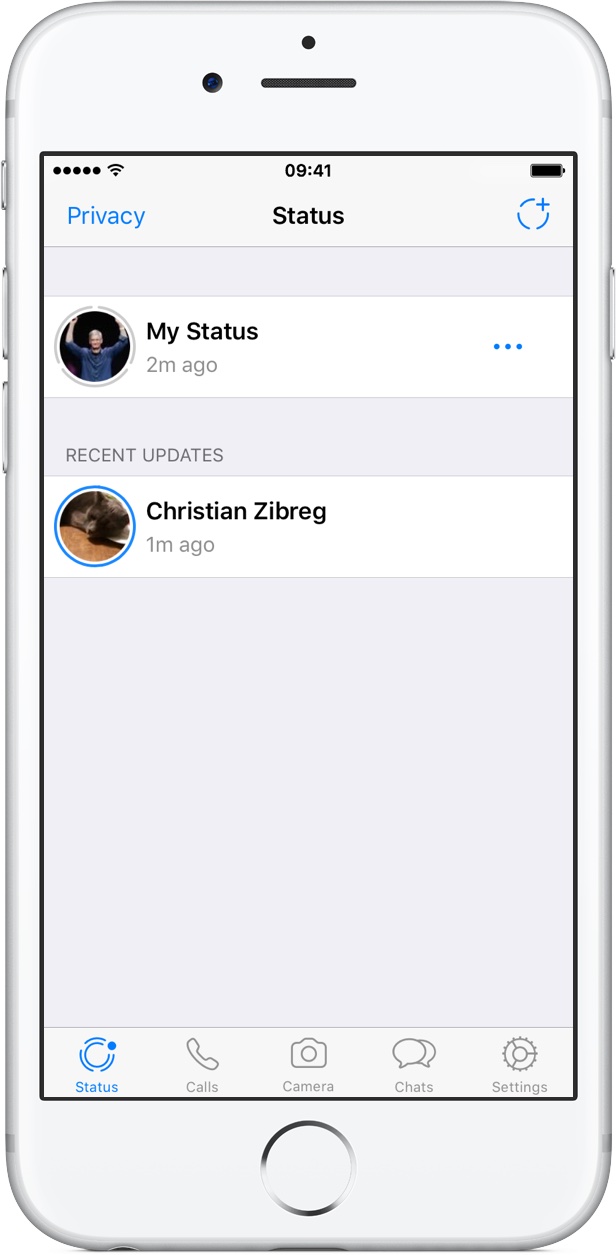
Tap a status to see it as an auto-running slideshow in full screen mode.

Swipe left/right to go to the previous/next item. Pull down to exit the slideshow.
How to adjust your status privacy on WhatsApp
To adjust who can see your status updates on WhatsApp, do the following:
1) Tap the Settings tab at the bottom of WhatsApp.
2) Tap Account → Privacy → Status.
3) Choose who can see your status updates:
- My Contacts—Share your statuses with all your WhatsApp contacts.
- My Contacts Except—Prevent selected contacts from seeing your statuses.
- Only Share With—Share your statuses with cherry-picked contacts.
The settings apply to statuses you post going forward, not to those you’ve already sent.

Regardless of your preference, your statuses cannot be seen by friends and family on WhatsApp whose numbers are not saved in your iPhone’s address book.
How to delete status updates on WhatsApp
By default, status updates on WhatsApp vanish automatically after 24 hours. You can also manually delete a status before the 24 hours have expired, here’s how:
1) Tap the Status tab at the bottom of WhatsApp.
2) Tap the three dots next to My Status.
3) Swipe left on the status you’d like to delete to reveal options. Now tap Delete, then confirm the action by choosing Delete from the popup menu.
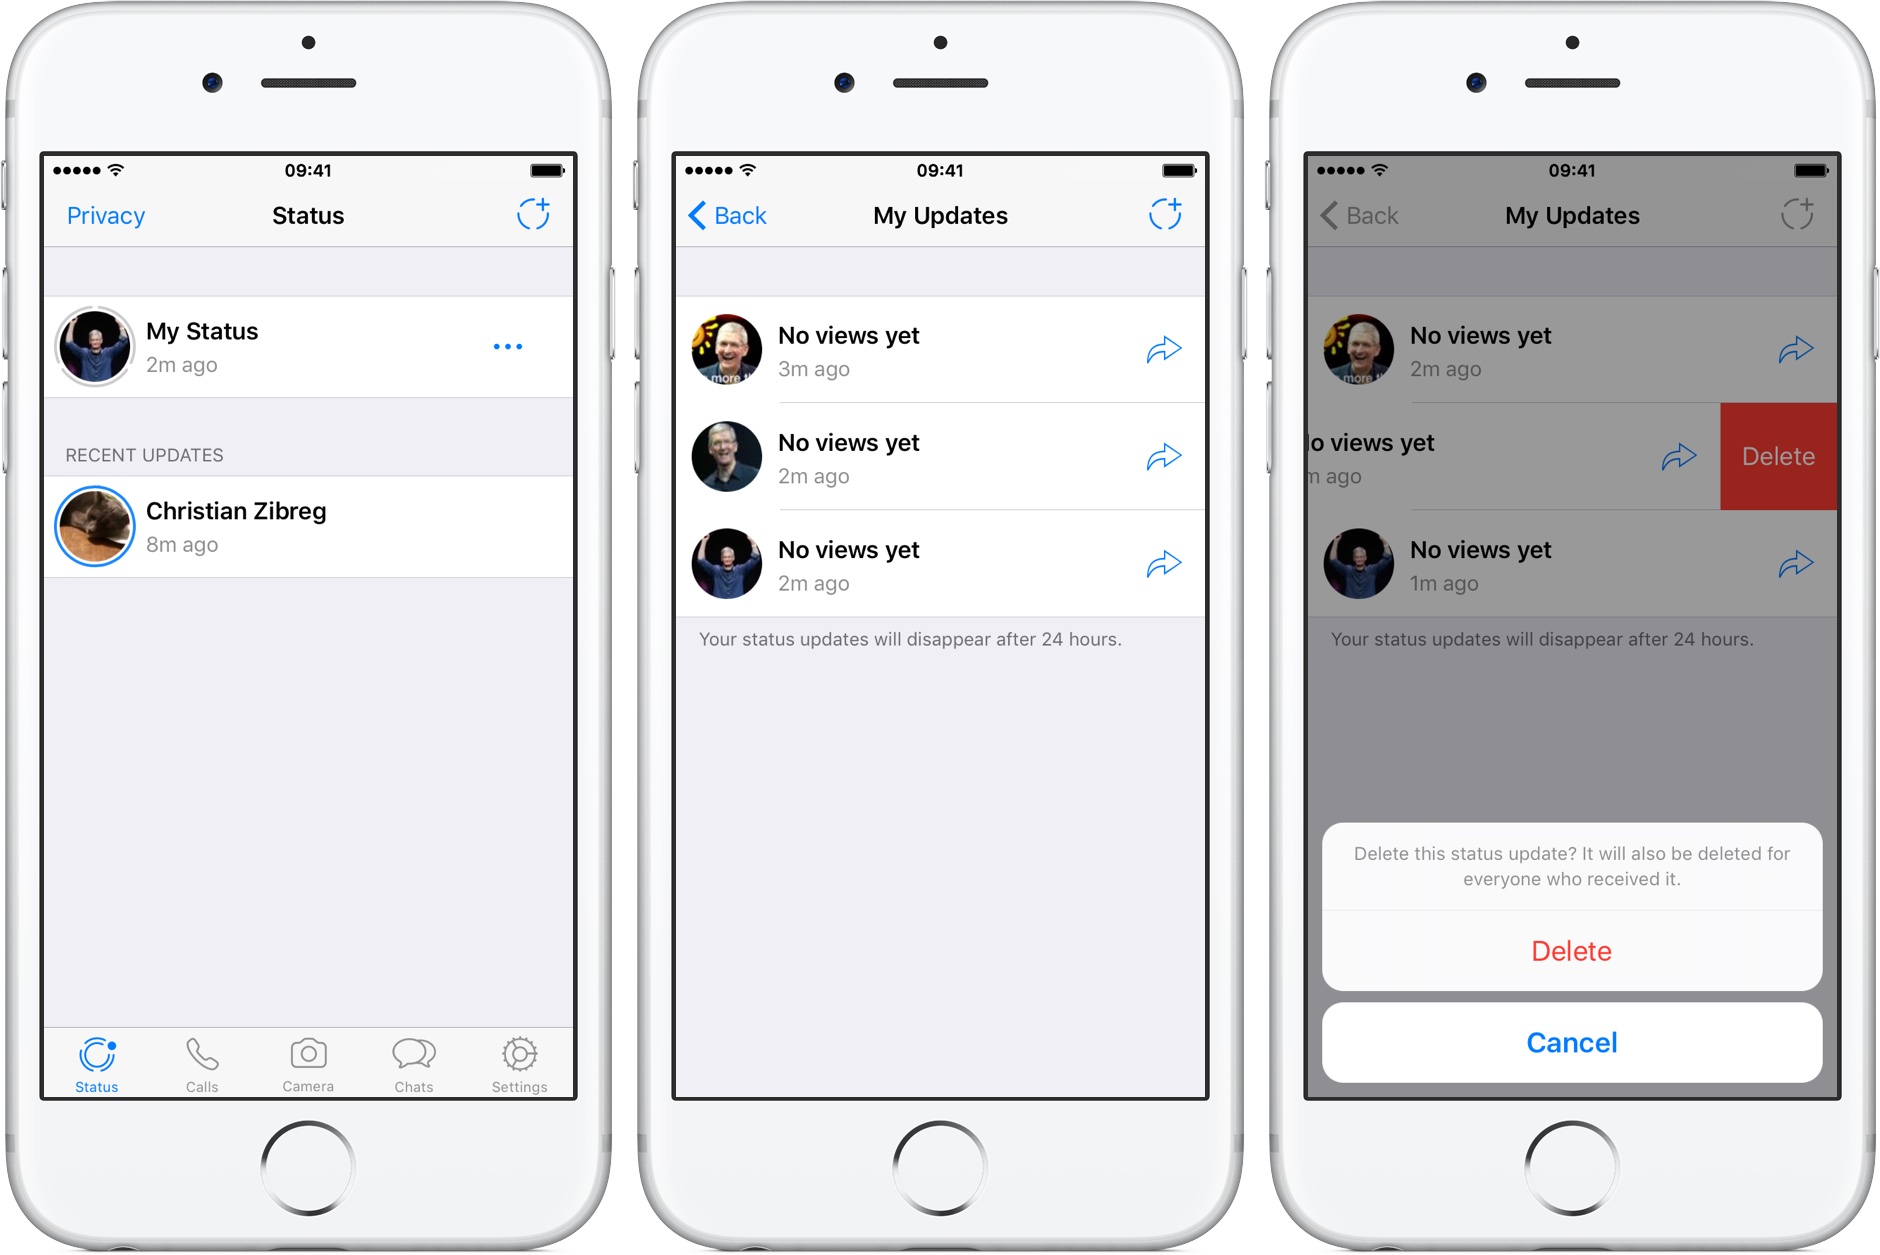
Deleting a status update removes it from both your own and your contacts’ devices.
Alternatively, delete a status while viewing it in fullscreen mode: drag the chevron at the bottom up to reveal options, hit the Trashcan icon and choose Delete from the menu.
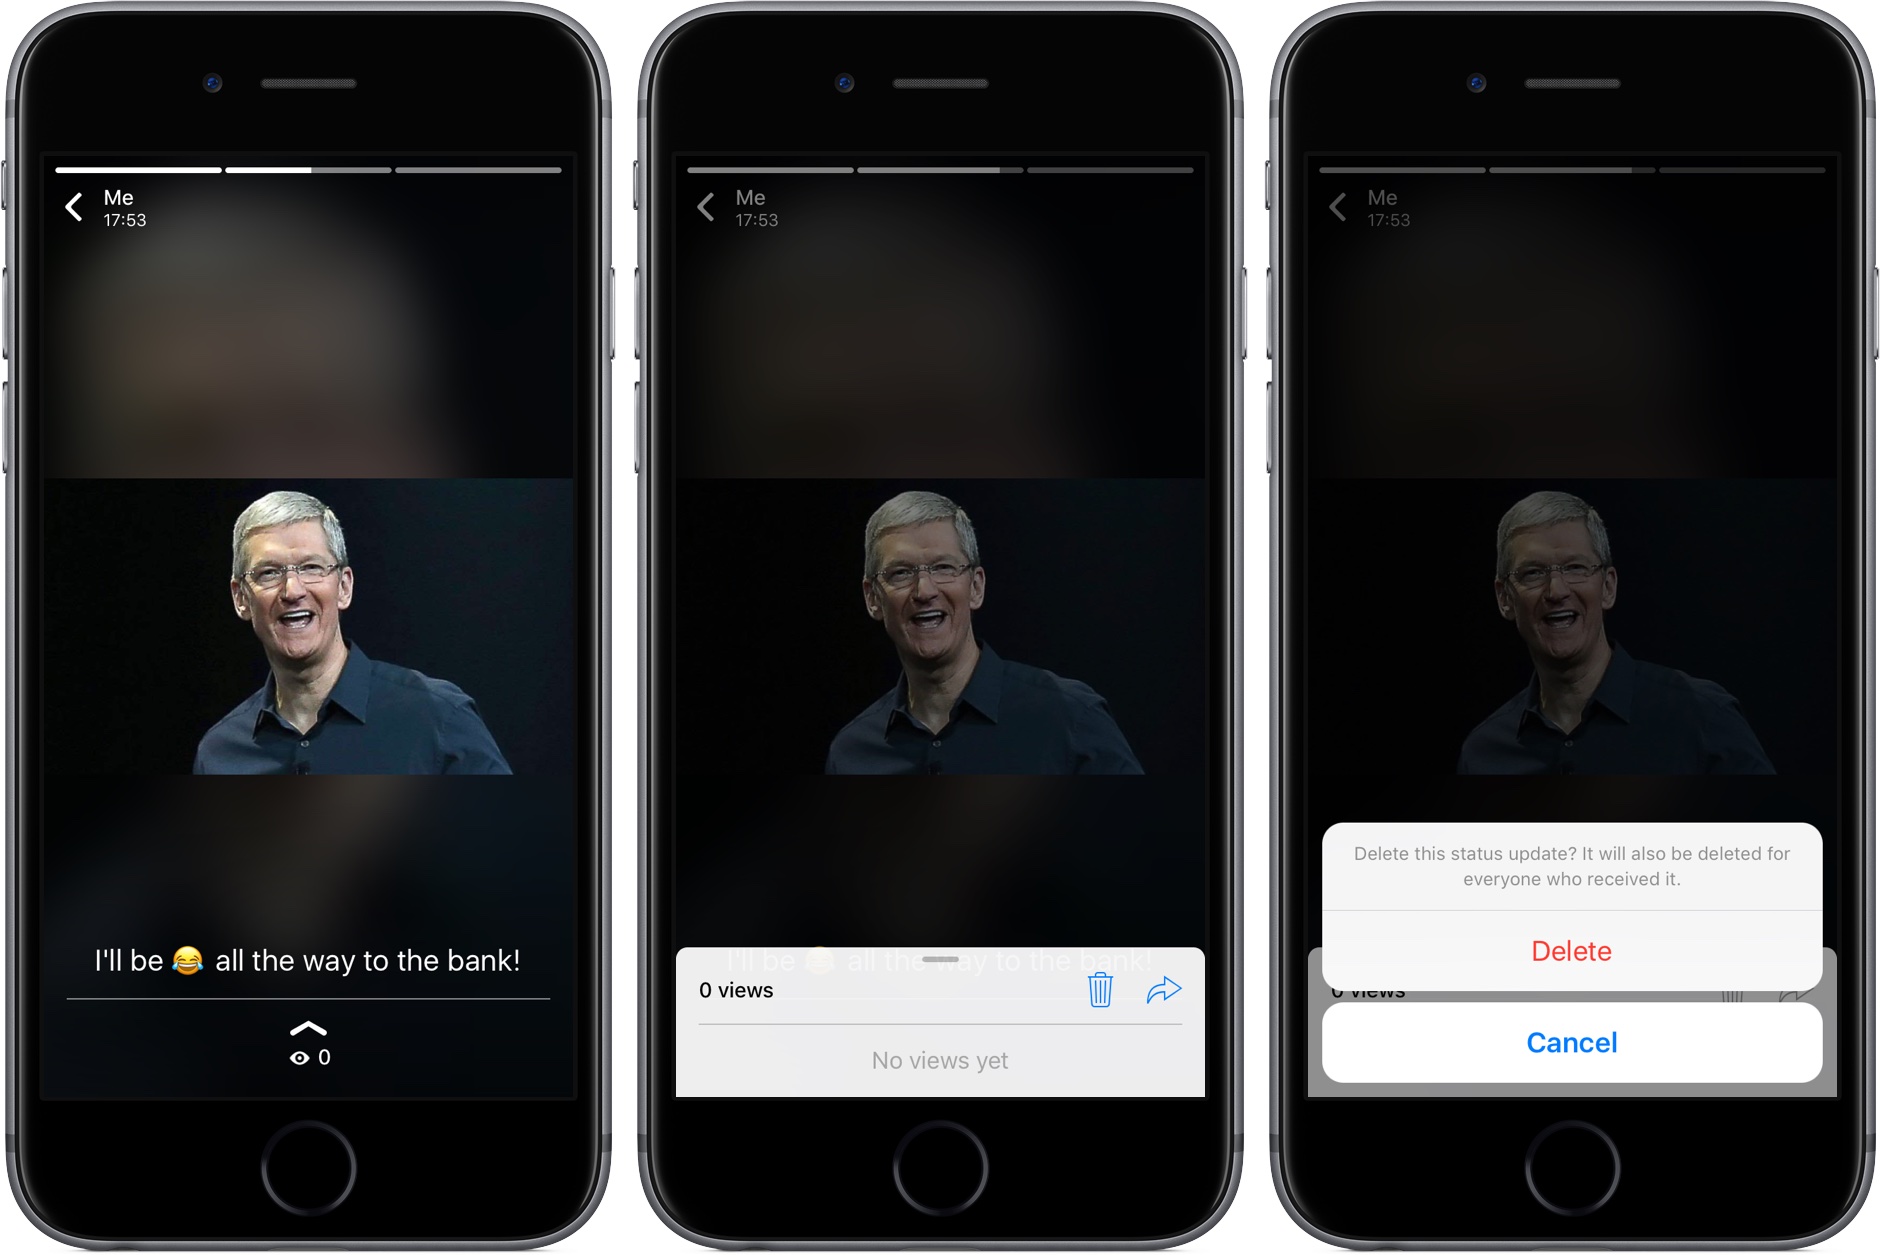
While viewing a status, the number of times it’s been seen is displayed at the screen bottom. To respond to someone else’s status while viewing it, hit the Reply icon.
Tip: If you don’t see who’s viewed your status, you must enable Read Receipts in WhatsApp Settings → Account → Privacy. If your contact has disabled Read Receipts, you won’t be permitted to see that they’ve viewed your status update.
How to mute status updates on WhatsApp
You can mute all status updates from a particular contact, which removes them from the top of your status list, with just a few taps.
1) Tap the Status tab at the bottom of WhatsApp.
2) Swipe left on a contact’s status you’d like to mute, then tap Mute.
You shall no longer receive status updates from that person.
How to unmute status updates on WhatsApp
1) Tap the Status tab at the bottom of WhatsApp.
2) Scroll down to see the muted statuses underneath the Muted heading. Swipe left on a status you’d like to unmute, then choose Unmute.
And with that, we conclude our tour of WhatsApp’s auto-disappearing statuses.
Now create your own Snapchat-like status on WhatsApp
What are you waiting for?
Armed with this knowledge, feel free to post to your WhatsApp status now!
